CVE-2024-6239
CVE-2024-6239
This is my first CVE!!! I am preparing to share the process of how I discovered, explored, and submitted this CVE.
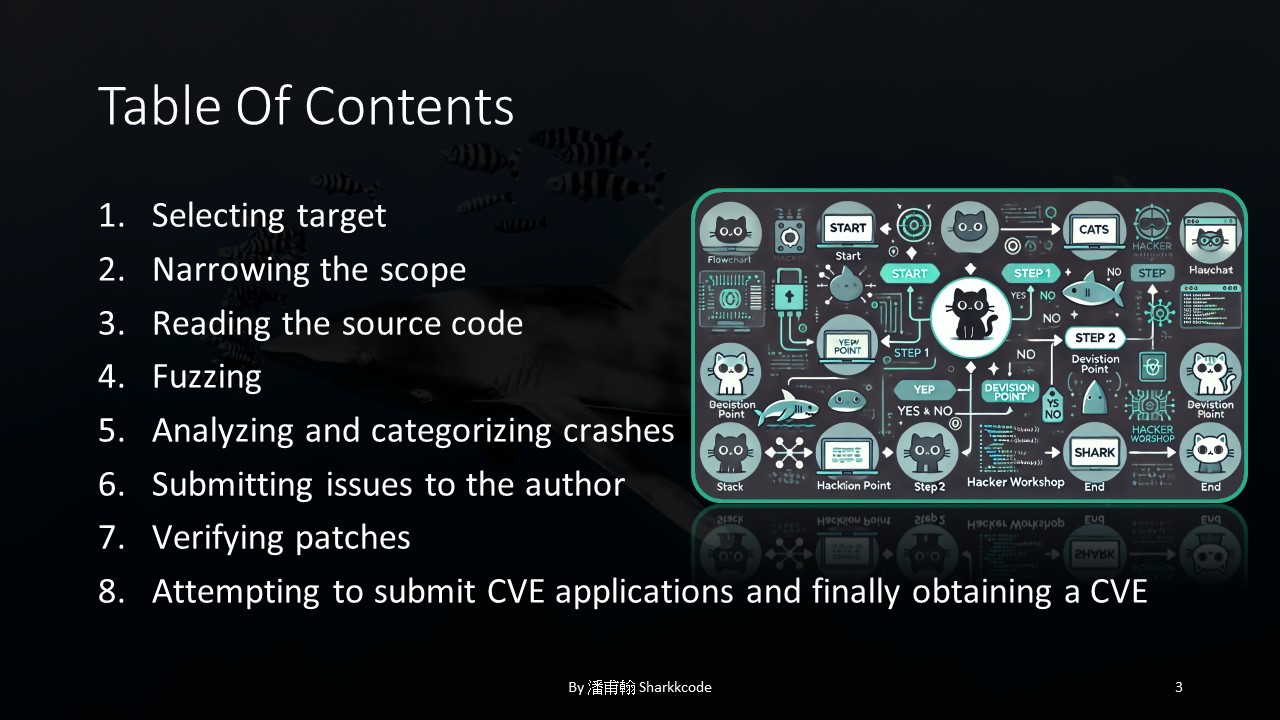
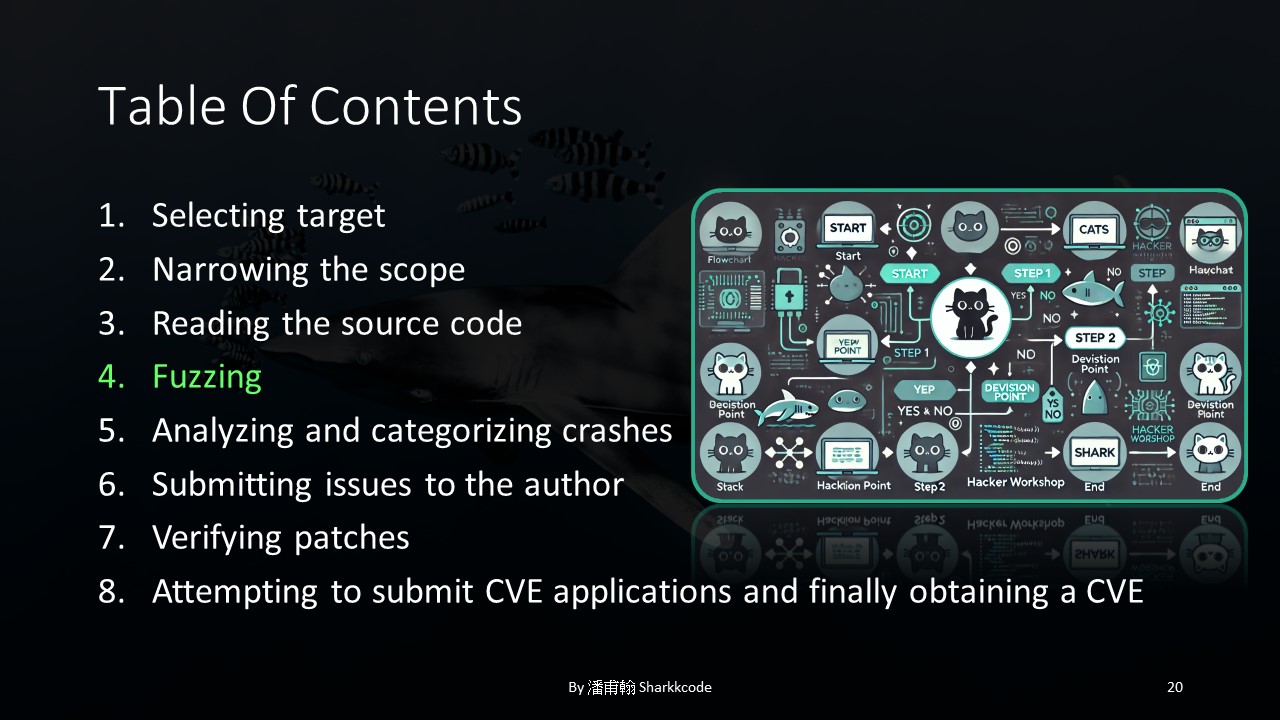
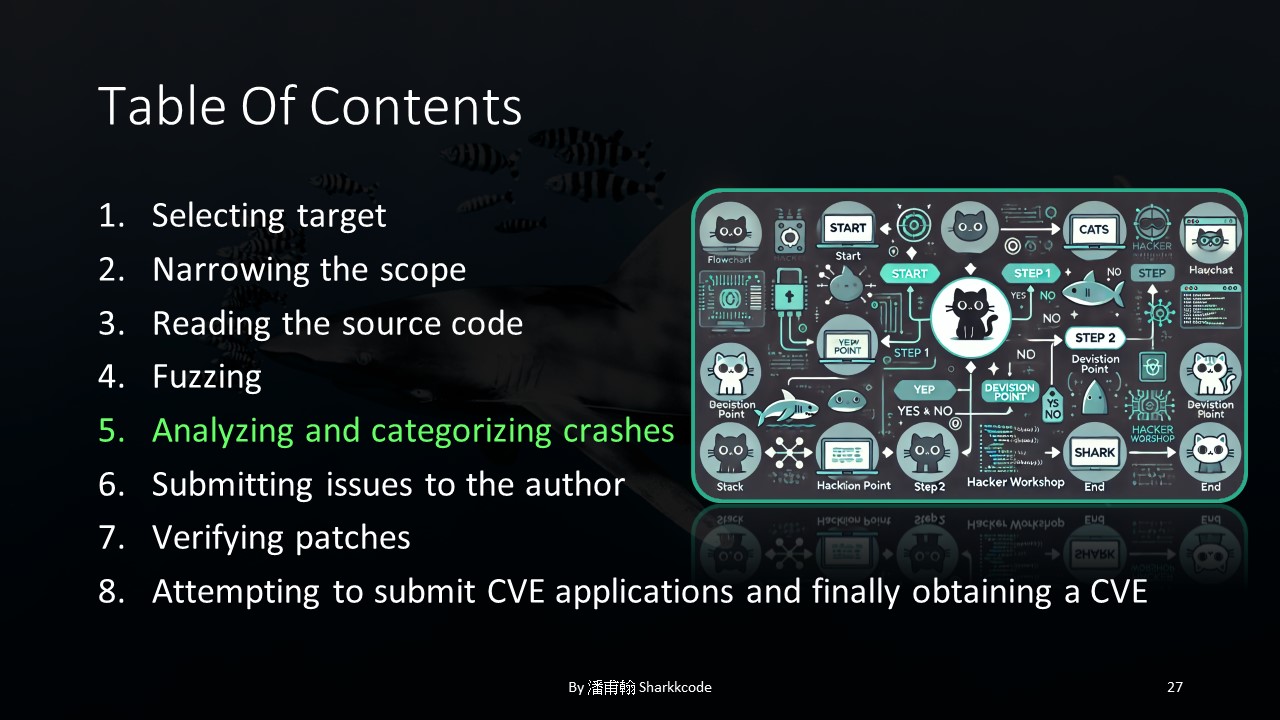
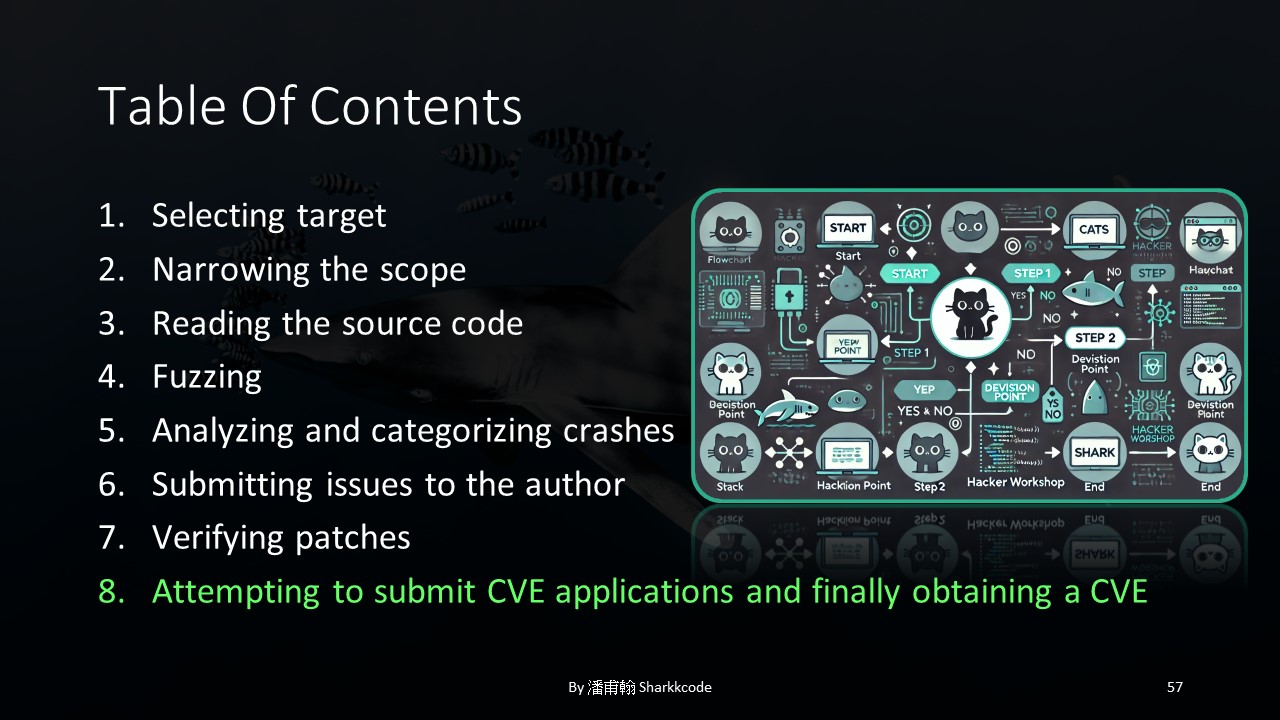
The structure of this topic will be presented as a directory that reflects the entire process of vulnerability discovery and CVE application from start to finish. The process involves selecting a target project, narrowing down the scope, reviewing the source code (since the project I’m researching is open-source), conducting fuzzing tests on areas of interest, analyzing the results, reporting the vulnerability to the author, checking if a patch has been applied, verifying whether the patch is successful, and finally submitting a CVE request and obtaining a CVE number.
First, I need to choose a target project.
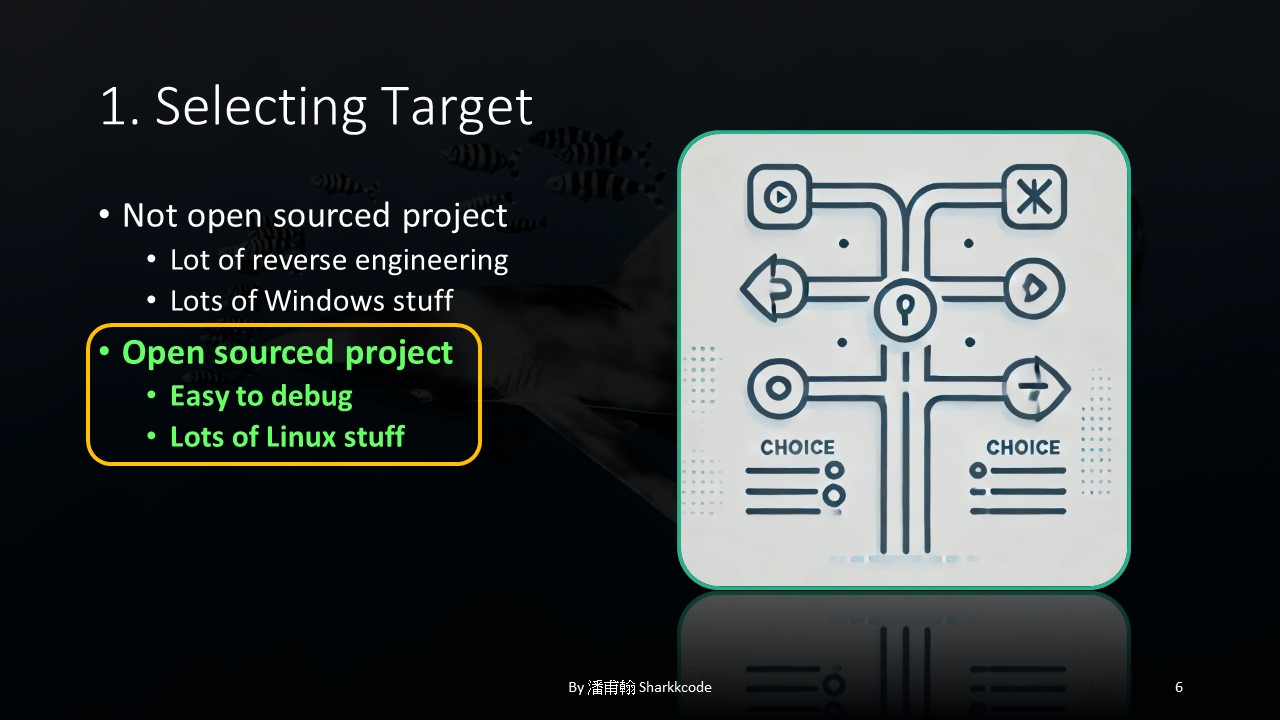
I had two choices: a closed-source project or an open-source project. Closed-source projects might require extensive reverse engineering, and many of them are Windows-based. In contrast, open-source projects allow direct analysis of the source code, making debugging relatively easier, and many projects are available on Linux.
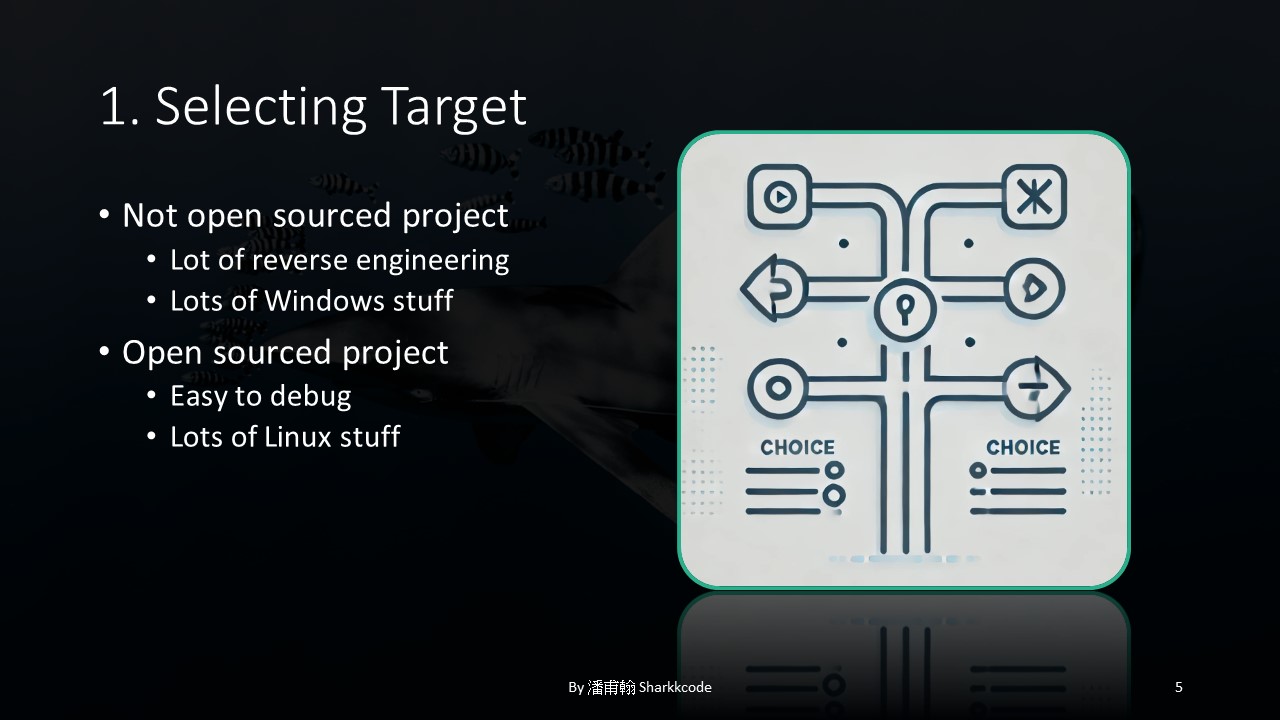
Therefore, I chose an open-source project for my research.
Next, I needed to gradually narrow down the scope and identify areas of interest.
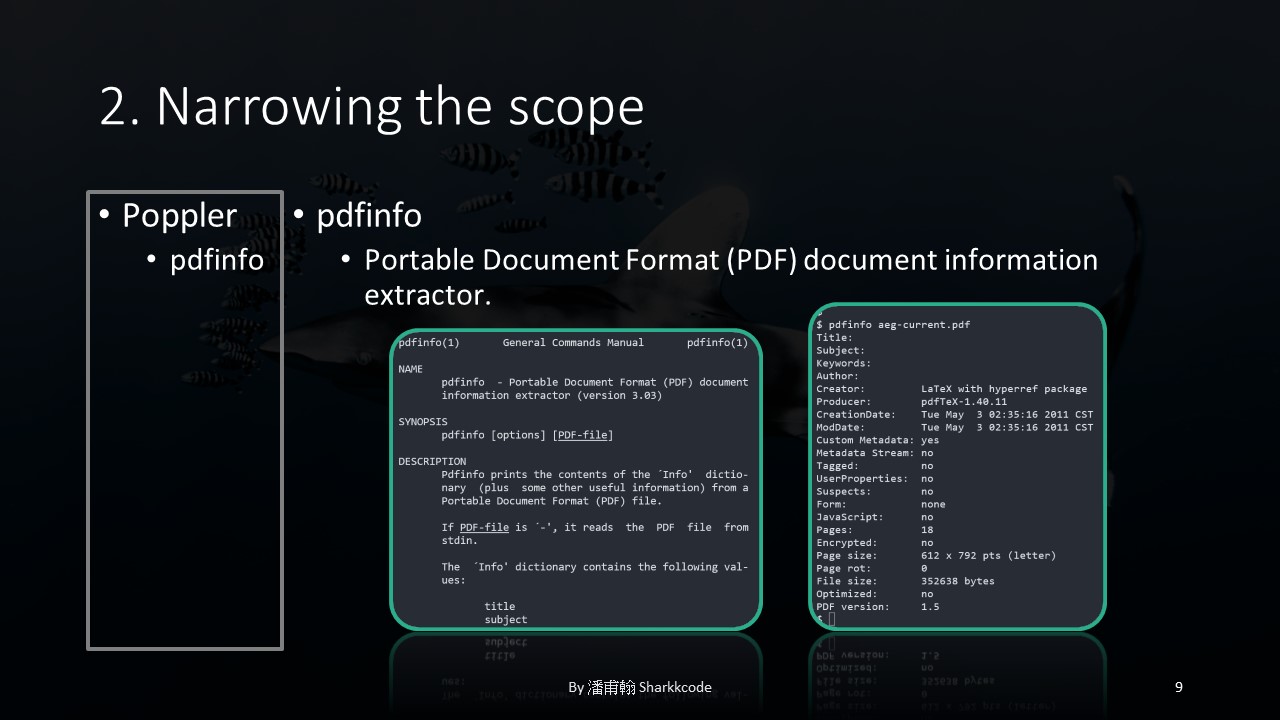
I selected the Poppler open-source project for my research.

Within it, I found an executable called pdfinfo , which is used to extract information contained in PDF files.
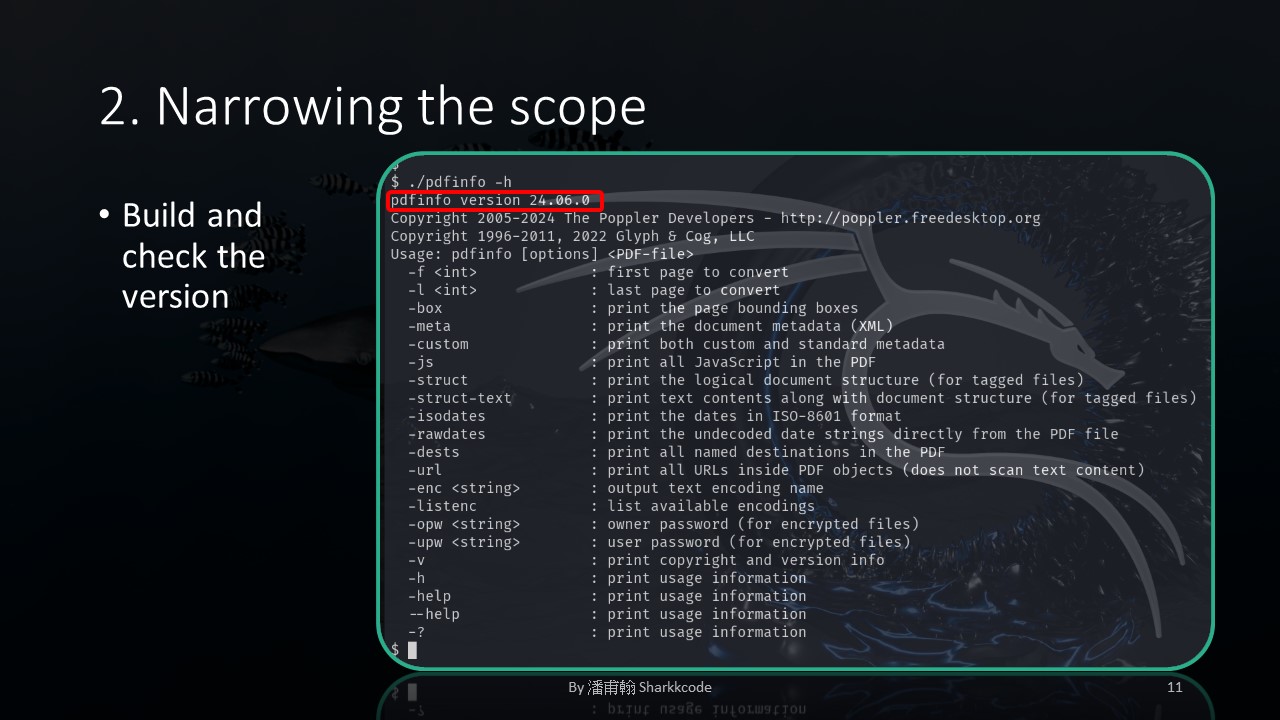
In addition to targeting the executable, I also needed to decide on the version of the executable to study. I chose the latest version at the time, 24.06.0.
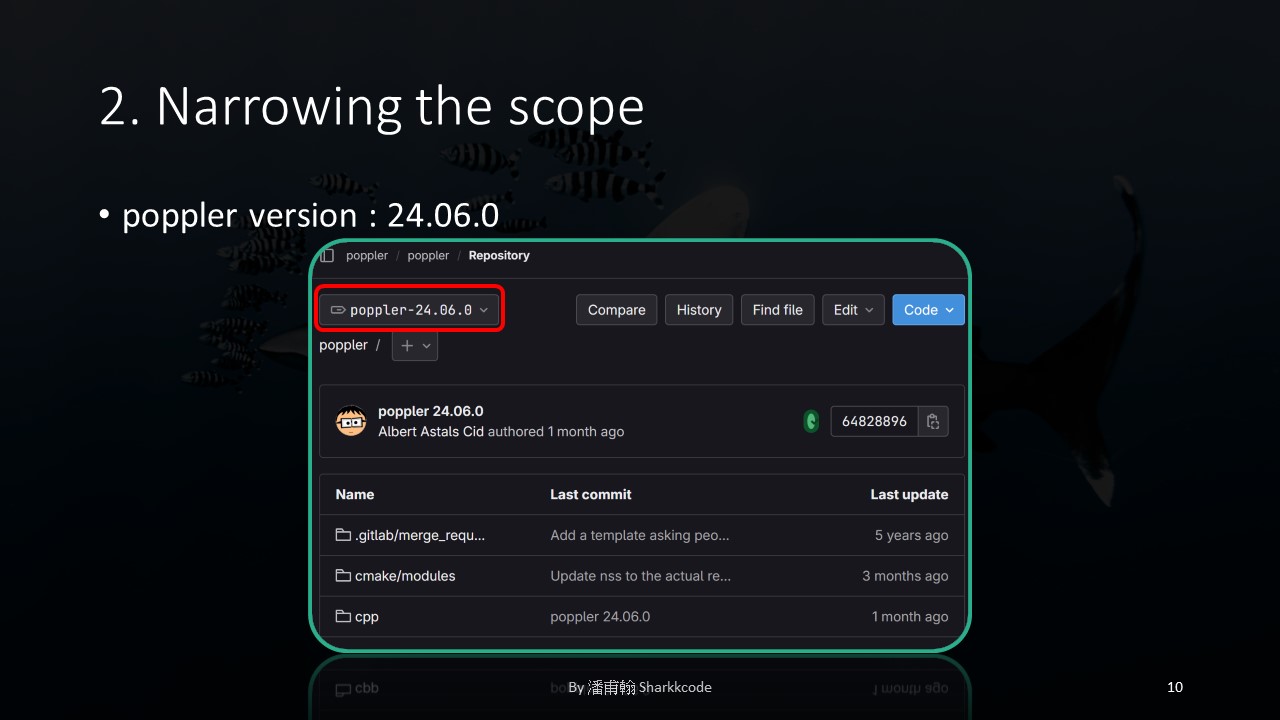
After setting up the environment on my local machine, I verified that the version was indeed the one I intended to study.
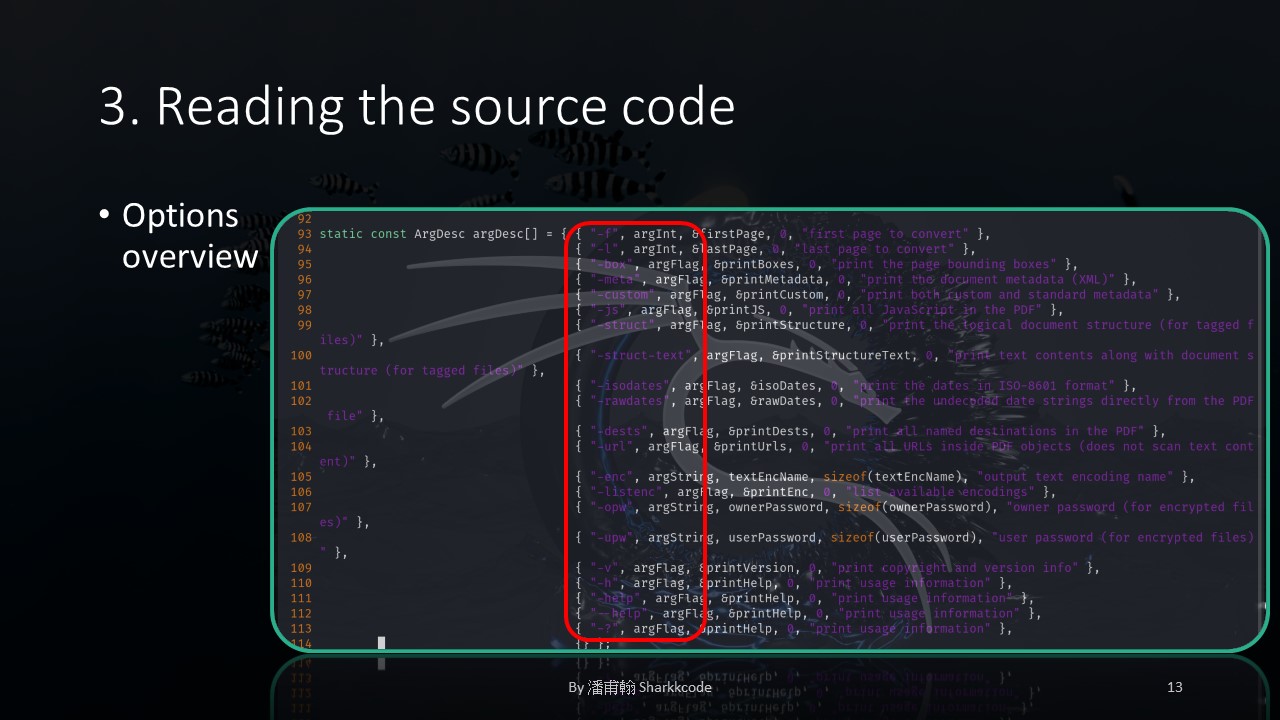
Next, I needed to analyze the source code to see if there were any parts worth testing or exploring further.
I noticed that the program accepts various options, each with corresponding implementations. I started by slowly browsing through each implementation, searching for anything that caught my interest.
Before long, I observed some slightly counterintuitive coding practices.
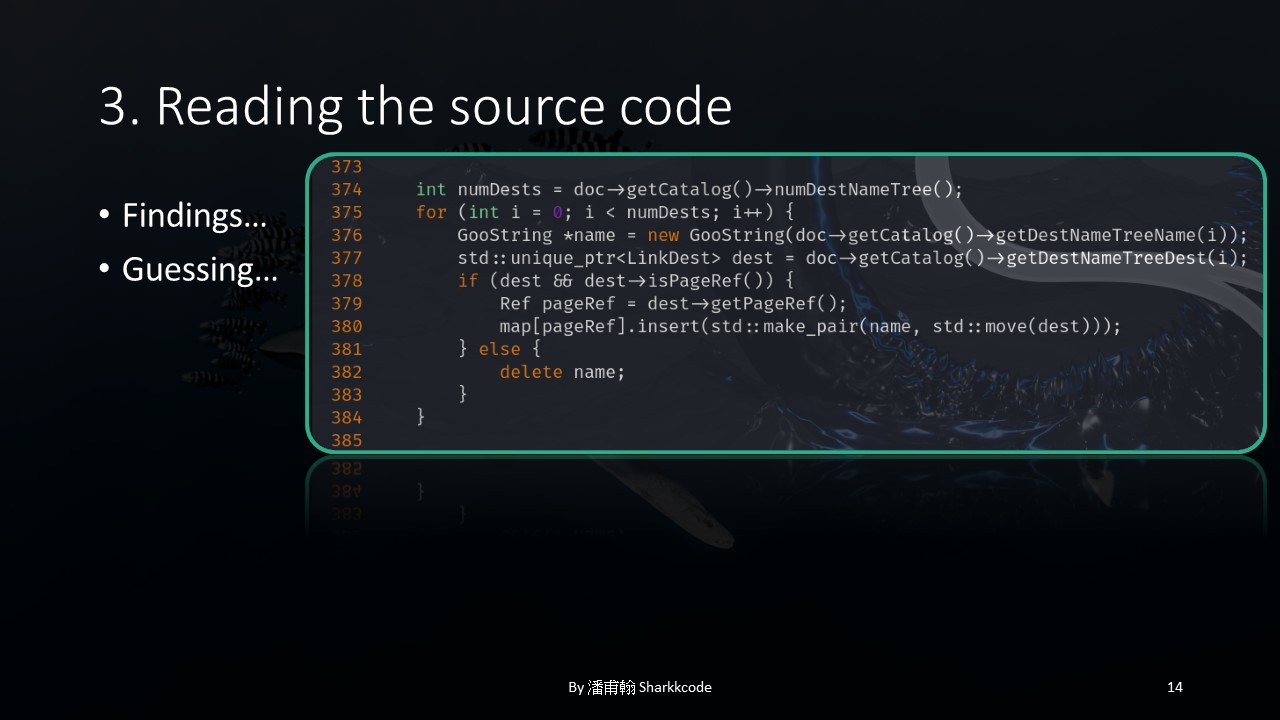
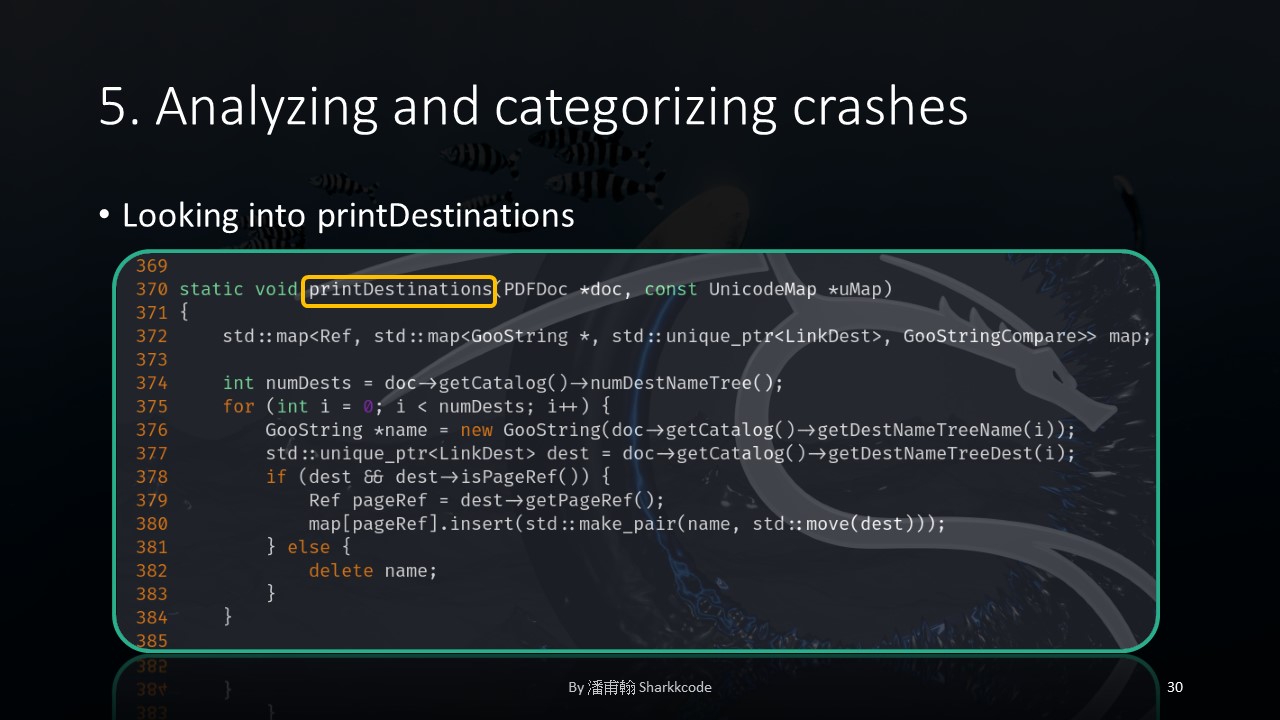
In this part, the getPageRef function is called by first passing doc through getCatalog , then through getDestNameTreeDest , and finally calling getPageRef .
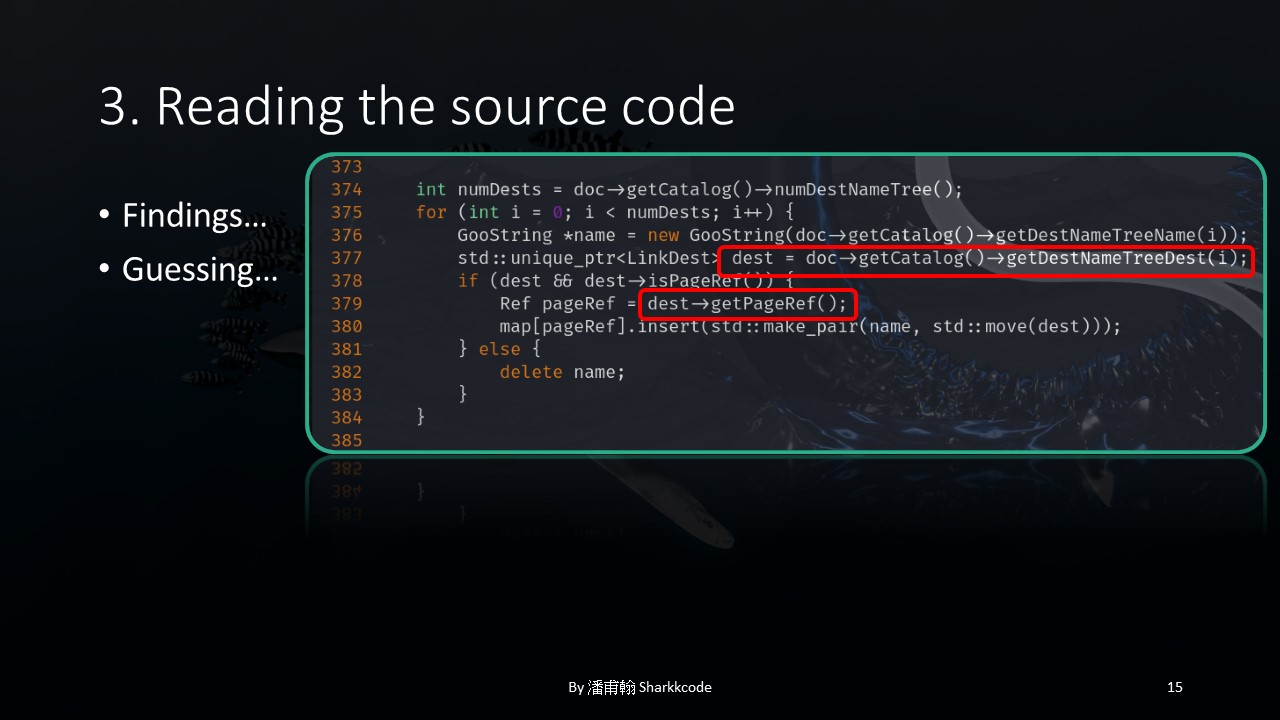
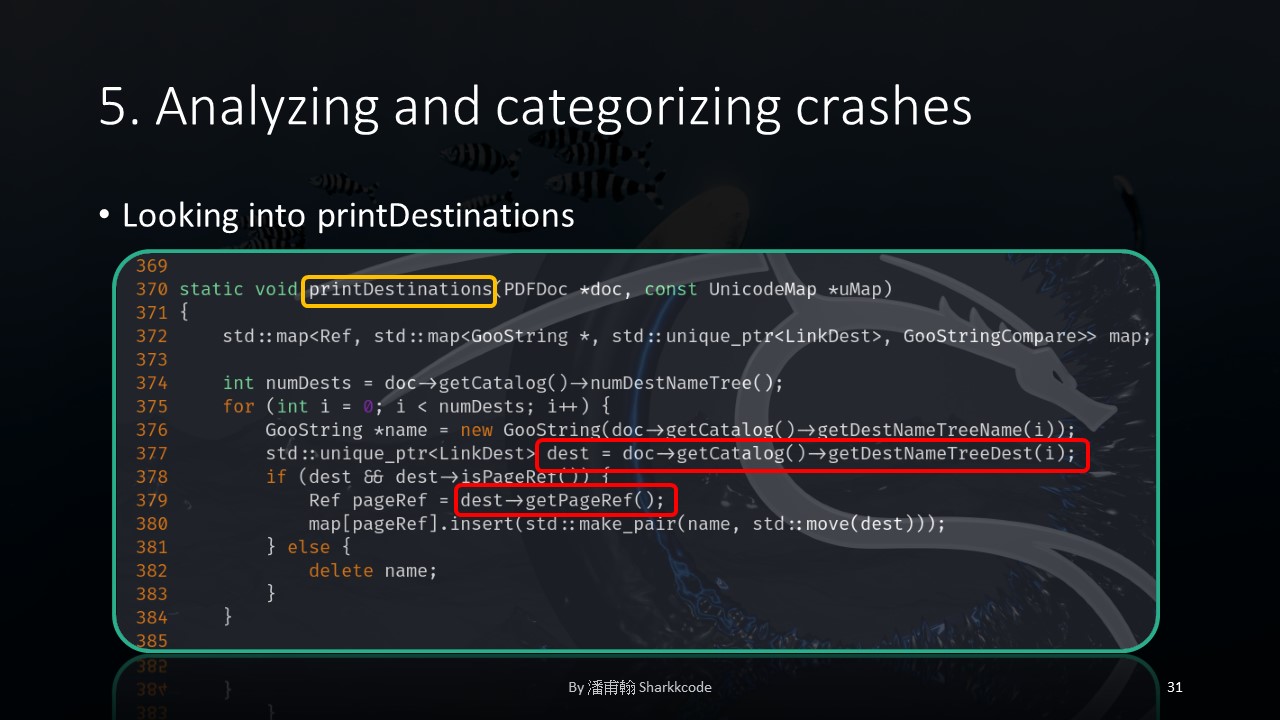
However, looking at the latter part of the code.
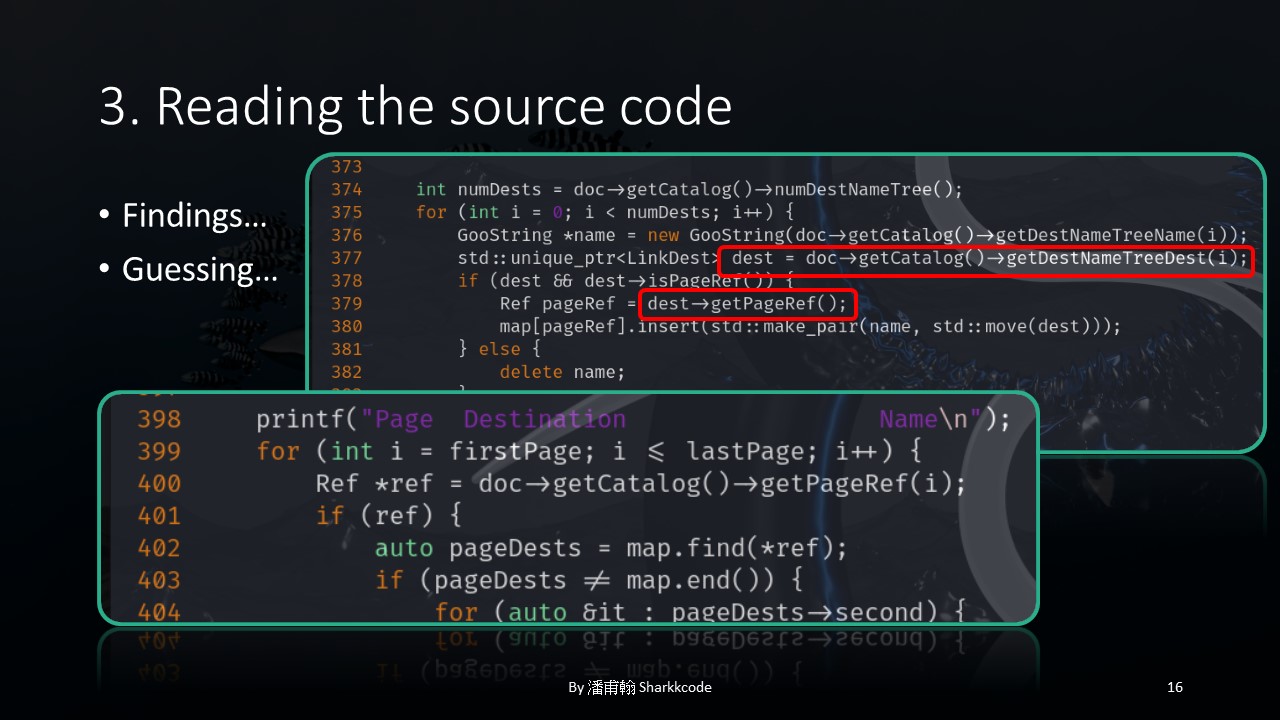
I found that doc is passed directly through getCatalog and then getPageRef is called, without going through getDestNameTreeDest , and an index i is present.
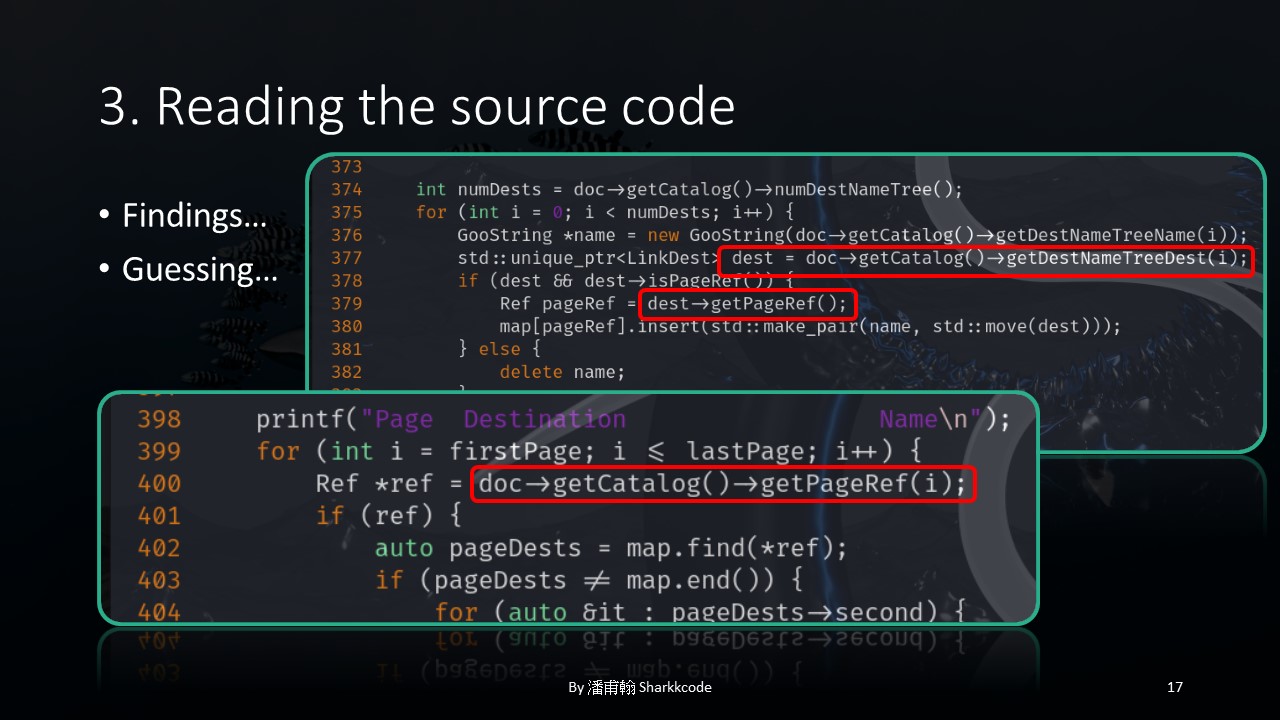
Now, I found something that I thought was interesting, though not necessarily a vulnerability. Besides continuing to read the source code, I considered testing whether this part could be problematic by creating a custom PDF for testing or using fuzzing.
At the time, I wasn’t very familiar with PDF structures, so I chose to use fuzzing.

This led to the fuzzing phase.
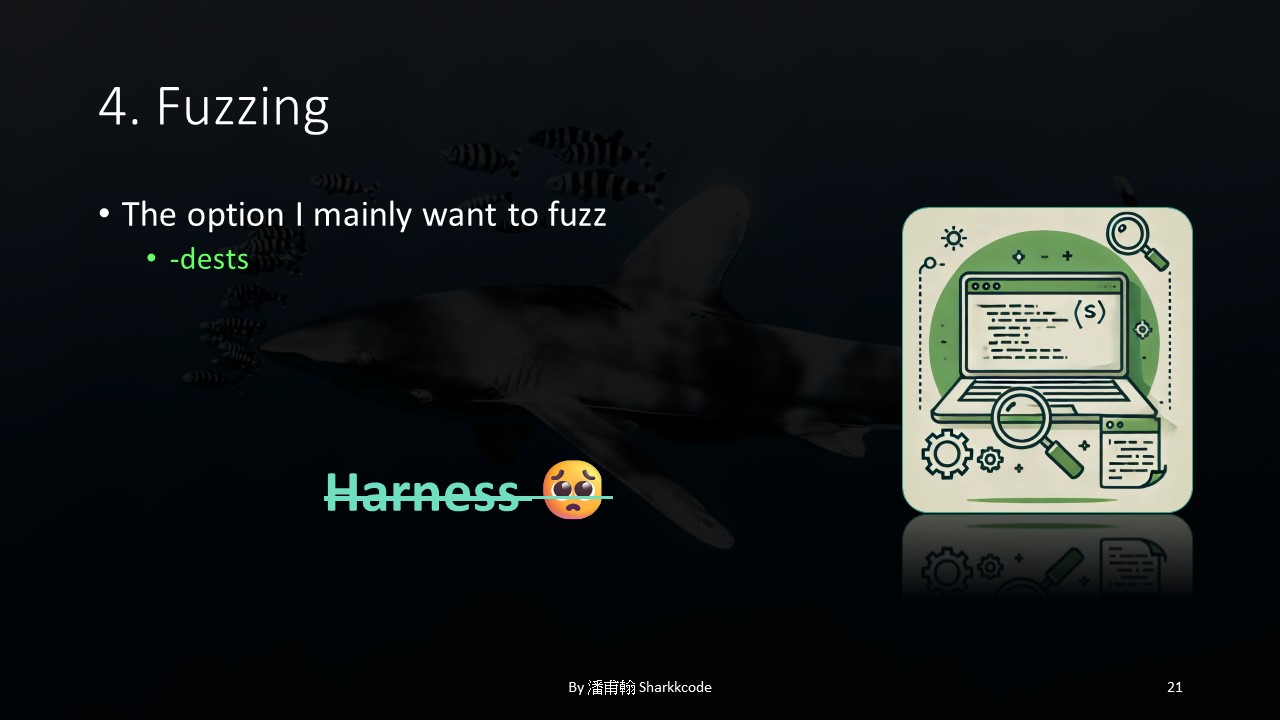
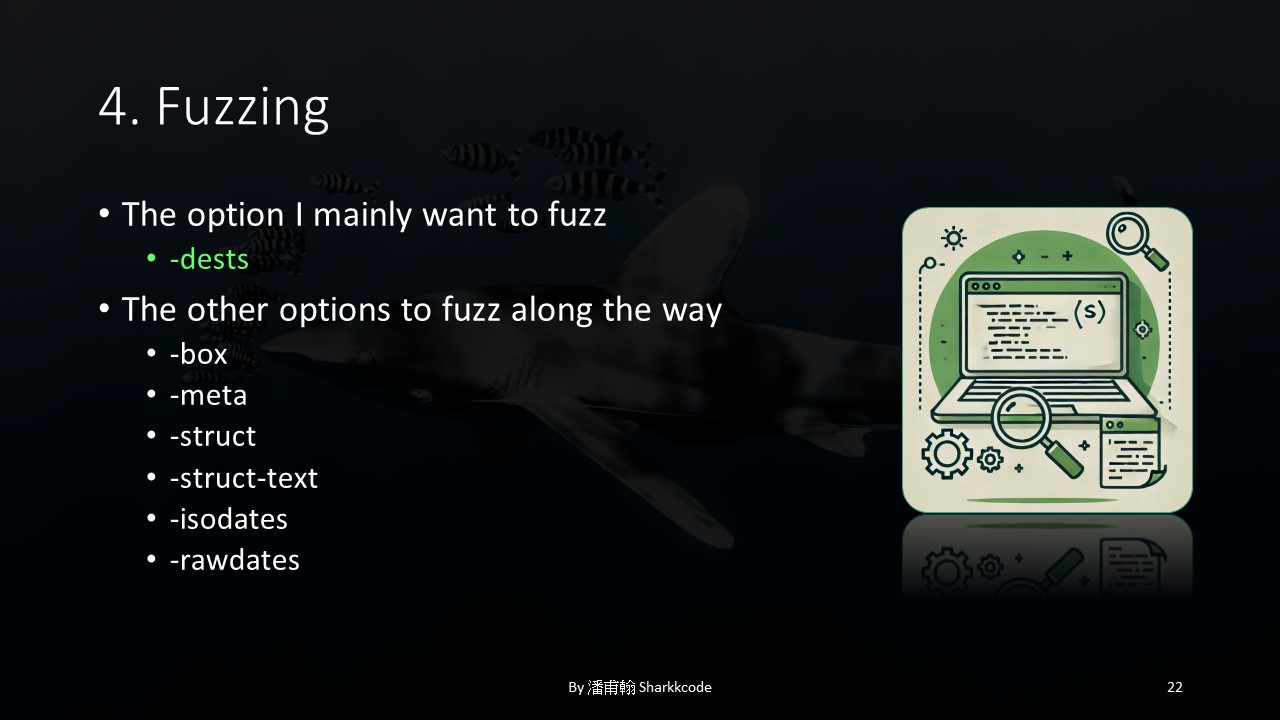
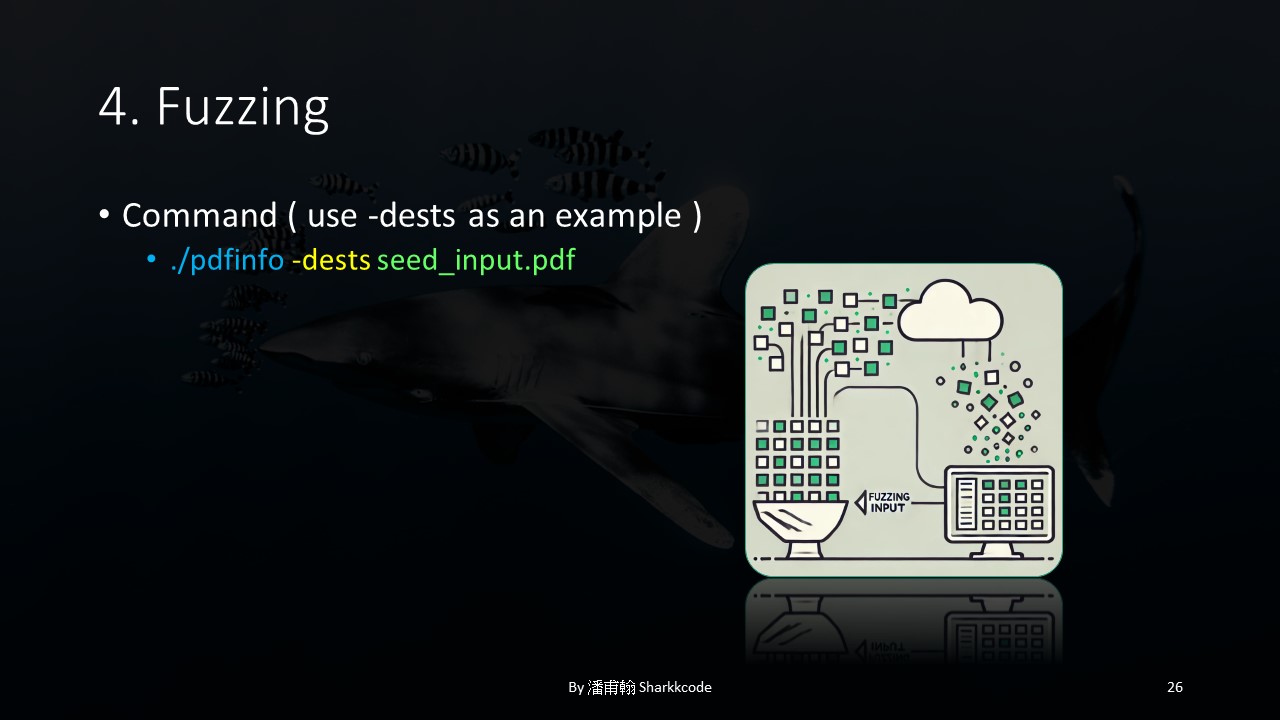
The code I mentioned earlier could be triggered when the user inputs the -dest option, so I decided to directly fuzz the -dest option. Ideally, when fuzzing a specific component, the better approach would be to write a harness to narrow the scope to the part I actually want to test. However, since this program wasn’t very large, I didn’t write a harness.
Since the fuzzing methods for options are similar, I thought I would select several options to fuzz simultaneously.
Before fuzzing, I thought about my fuzzing approach: whether to use white box fuzzing or black box fuzzing. Theoretically, since I had access to the source code, I should have instrumented the code first and then used white box fuzzing, but at that time, I hadn’t yet figured out the details of instrumentation.

So, I decided to start with black box fuzzing, partly because I was curious to see what results black box fuzzing might yield on a project where most people use white box fuzzing to find vulnerabilities.

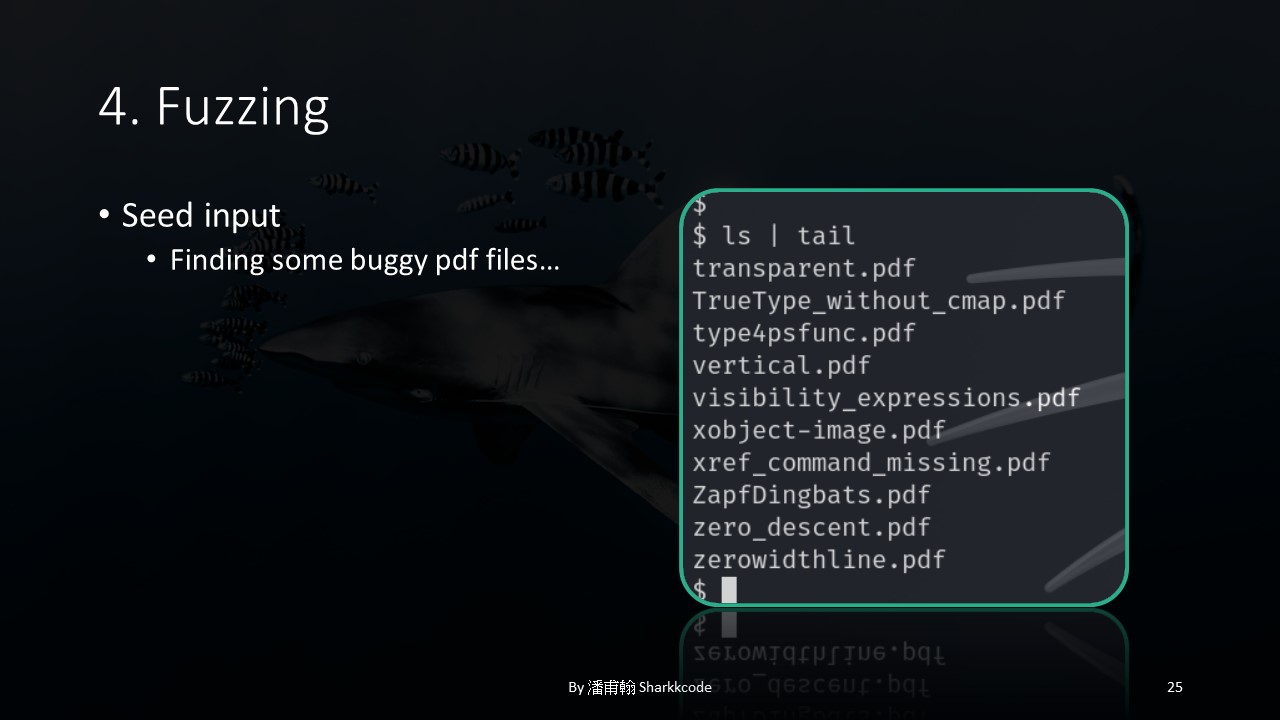
Choosing suitable initial seeds for fuzzing is also important. I found some buggy PDFs online that had previously caused issues.
Here’s the command format I used for fuzzing. Everything was set, and I was ready to wait for the results.
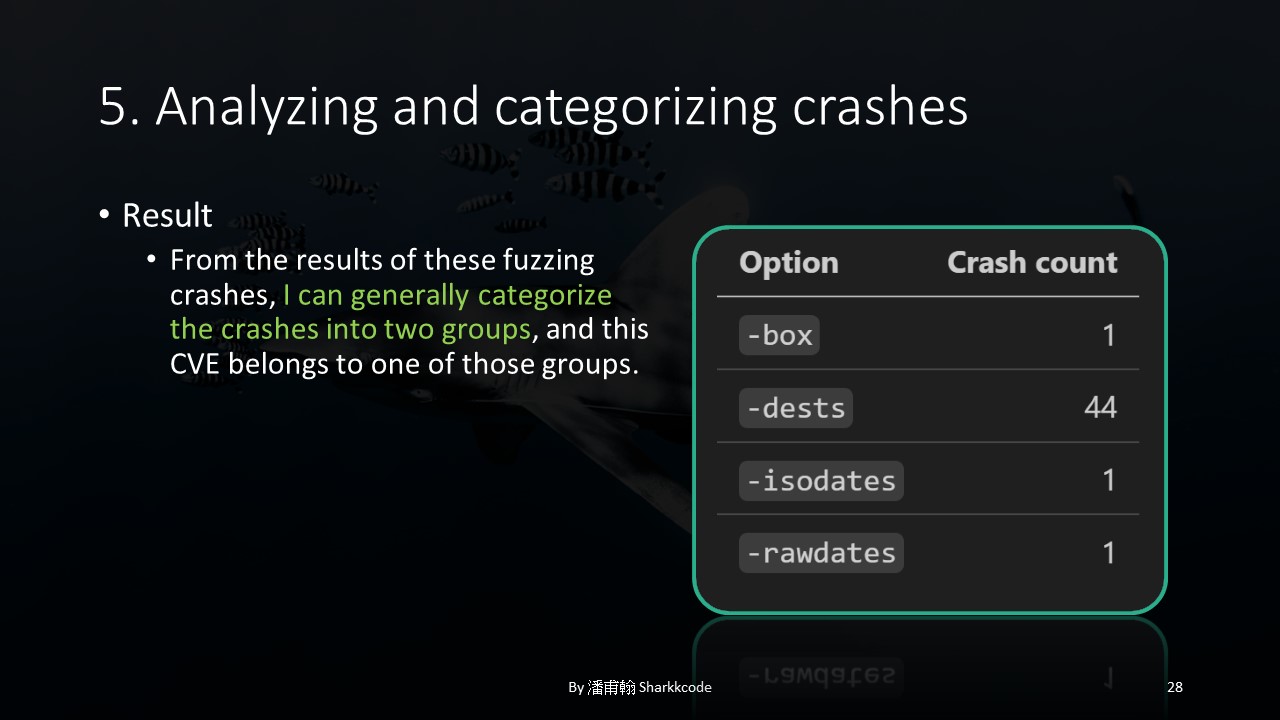
After about a day, I checked back and indeed found some results. I prepared to do a crash analysis.
The results showed 47 unique crashes, most of which occurred with the -dest option that initially interested me. After some categorization, I classified these crashes into two types, and the CVE I obtained was triggered by one of these crash types. The following analysis will focus on the POC that caused this CVE.
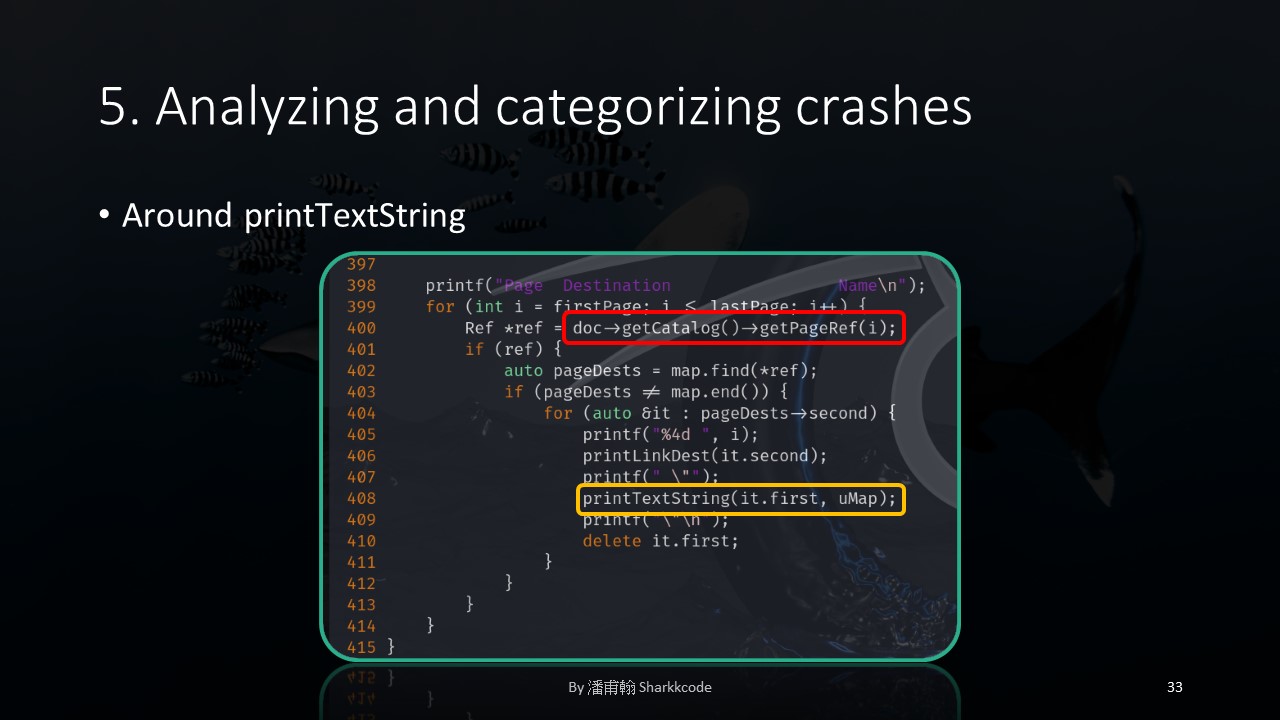
I used GDB to backtrace how this crash was triggered. I could clearly see three functions corresponding to the source code: printDestinations , printTextString and TextStringToUCS4 .
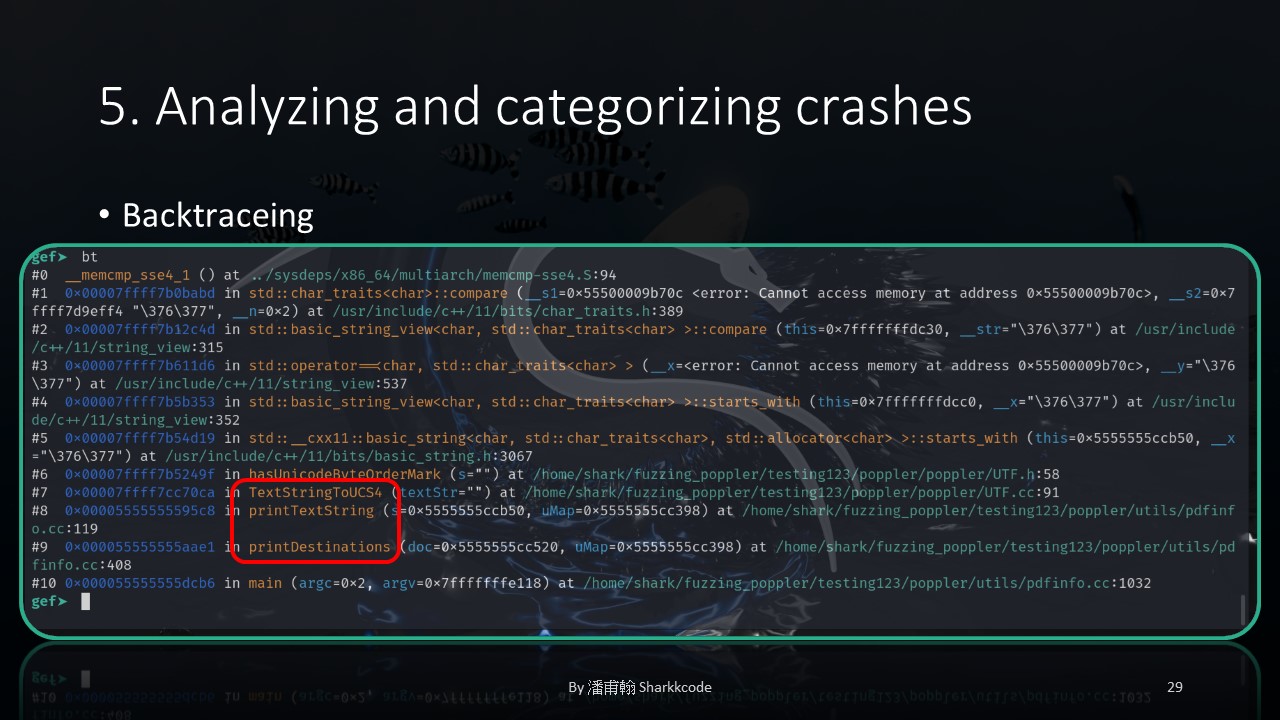
Now I entered printDestinations .
I could see the interesting part I had discovered earlier!
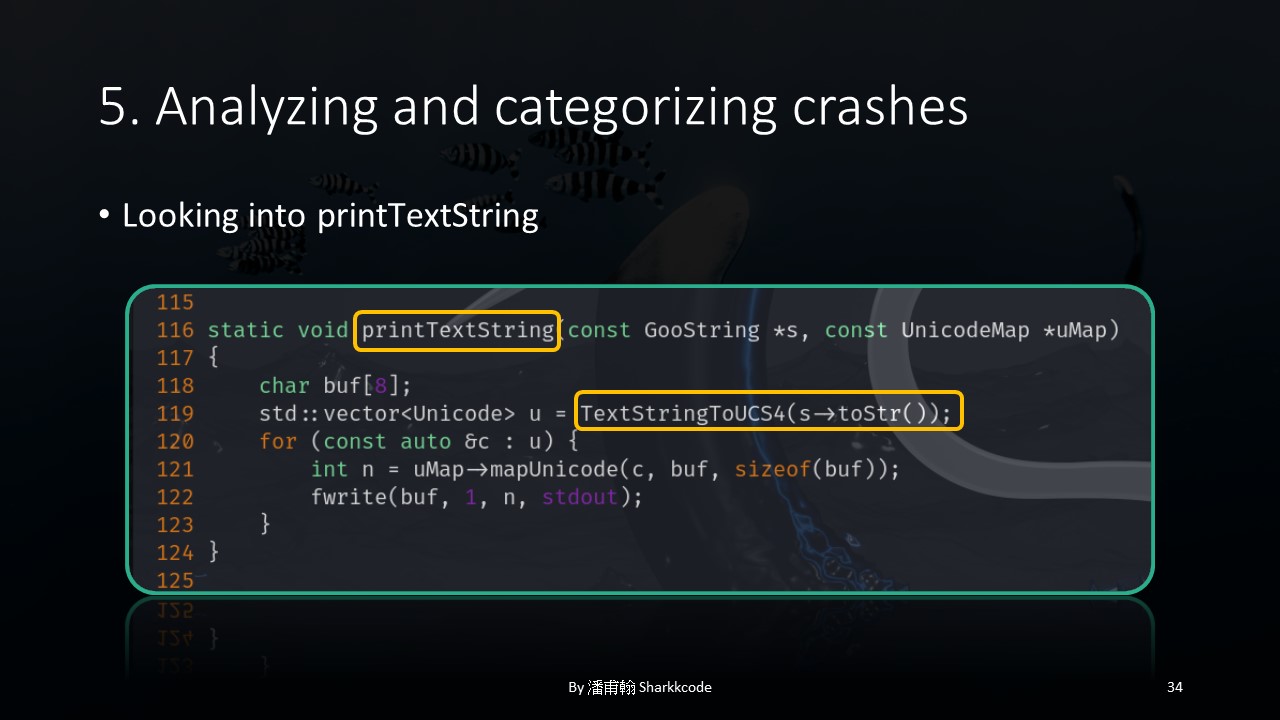
Then I moved on to printTextString .
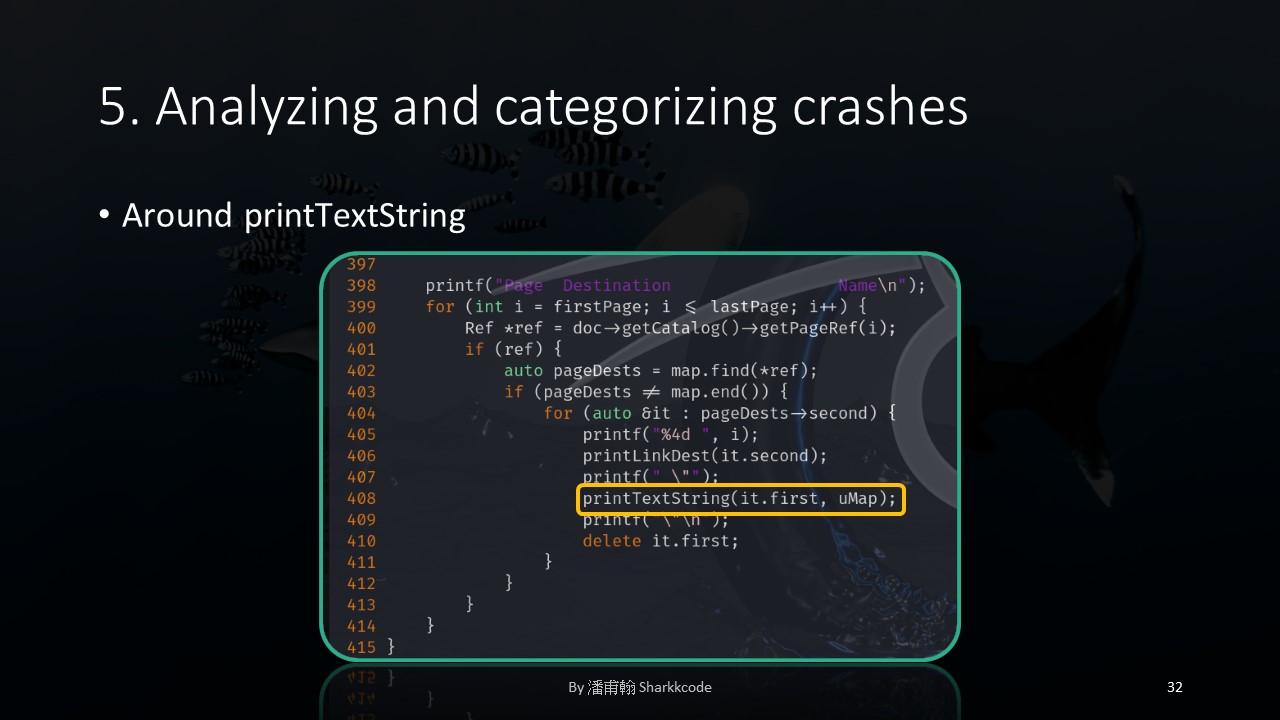
Again, the interesting part I had discovered earlier appeared!
When I stepped into printTextString , I indeed saw TextStringToUCS4 .
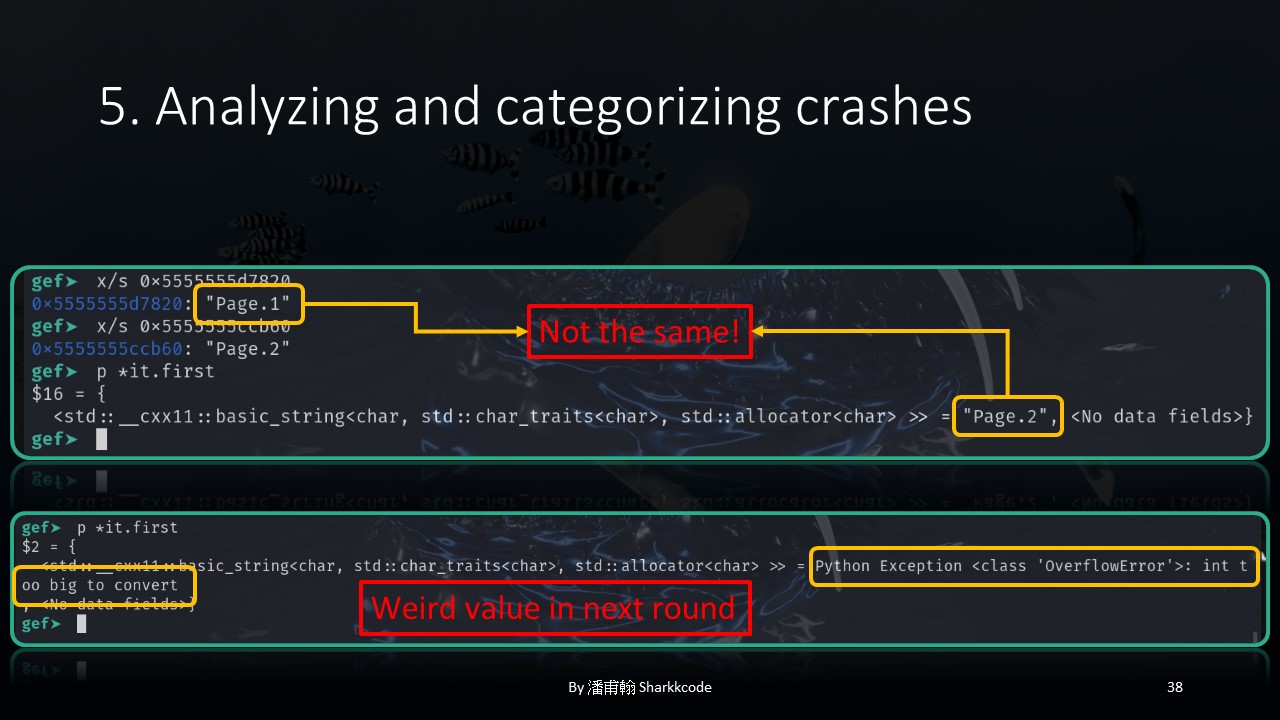
Continuing to observe with GDB, I could see that initially, both Page.1 and Page.2 were recorded.
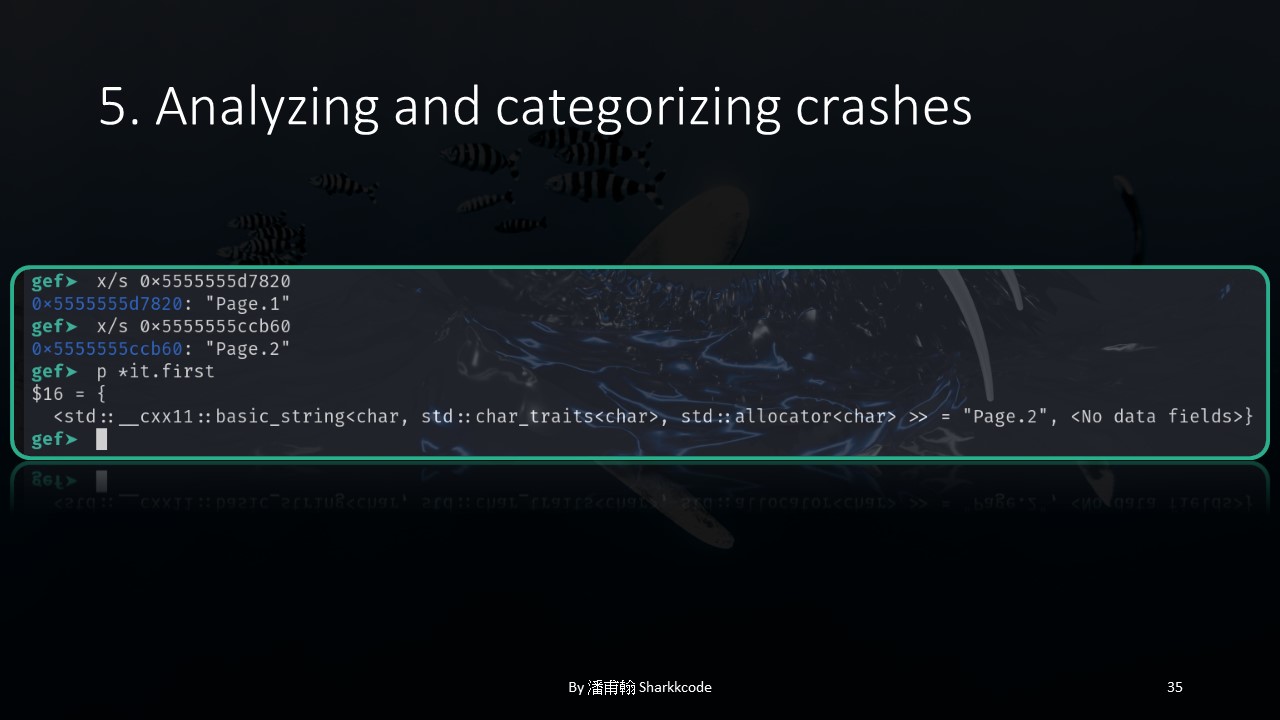
However, it later became clear that it.first was pointing to Page.2 instead of Page.1 .

Then, as the program progressed to the next iteration of it.first .
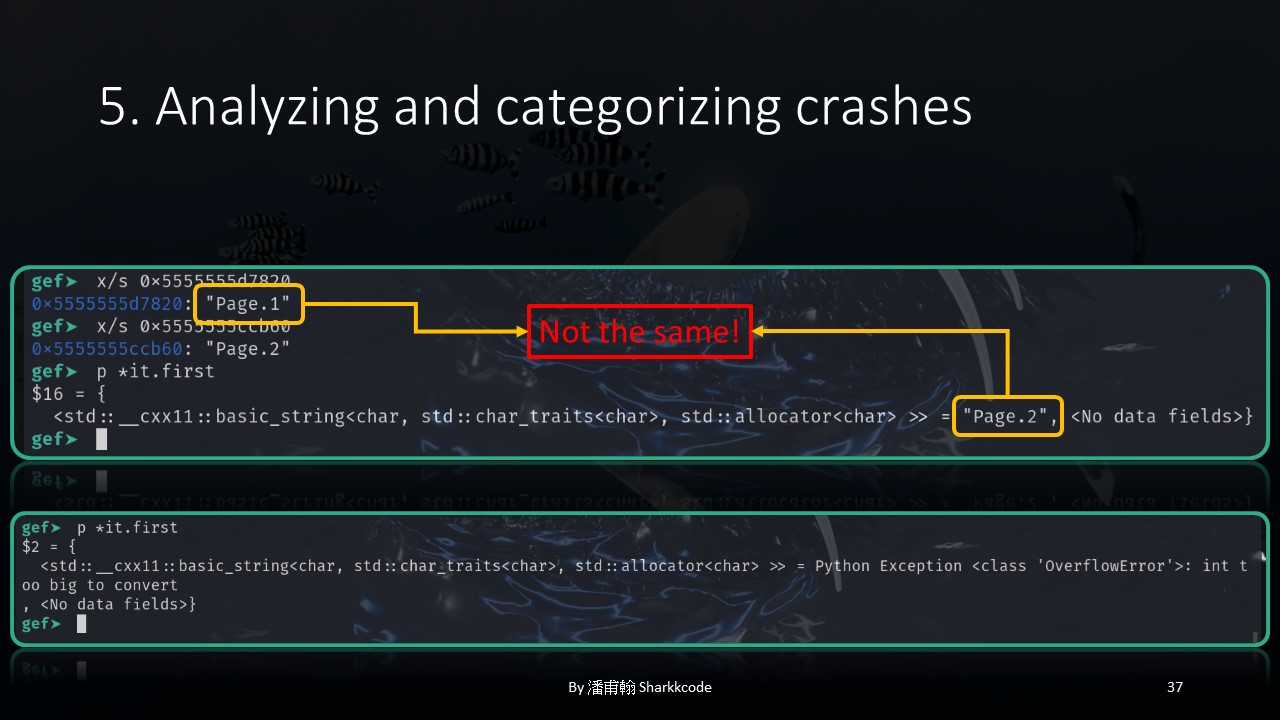
I noticed that the pointer began rendering abnormal values.
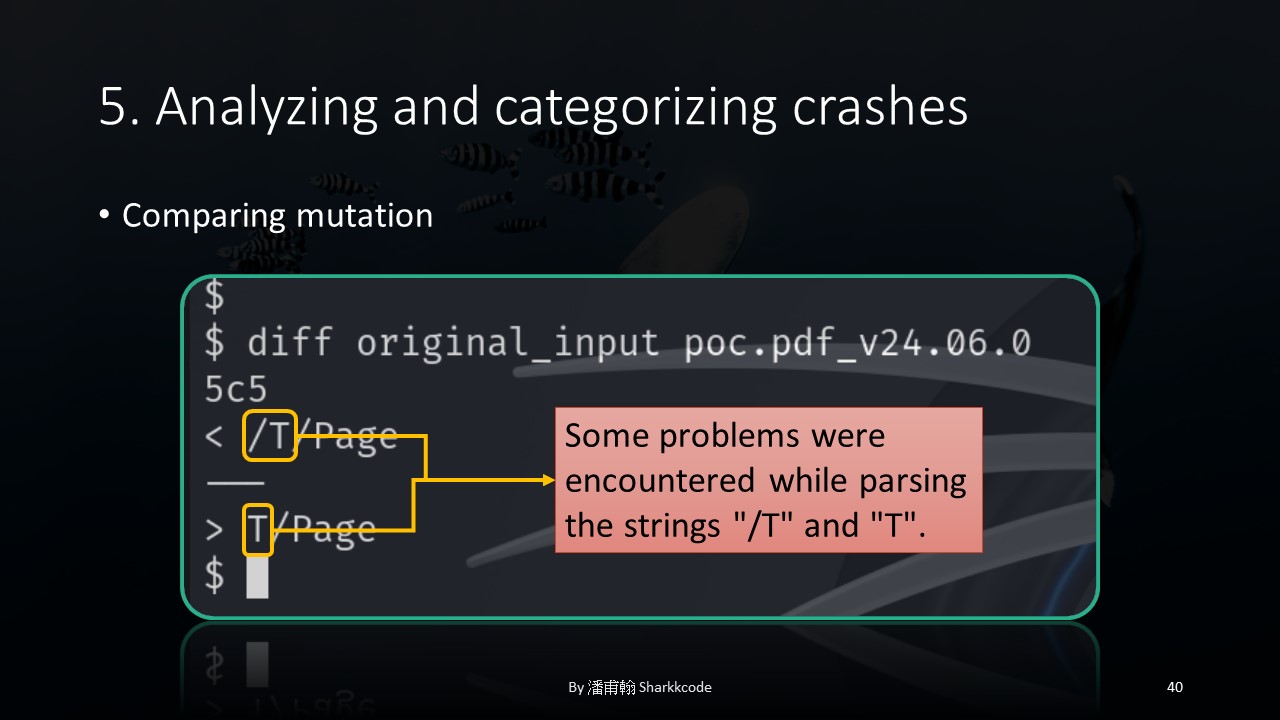
At this point, I compared the POC that caused the crash with the original payload before mutation.
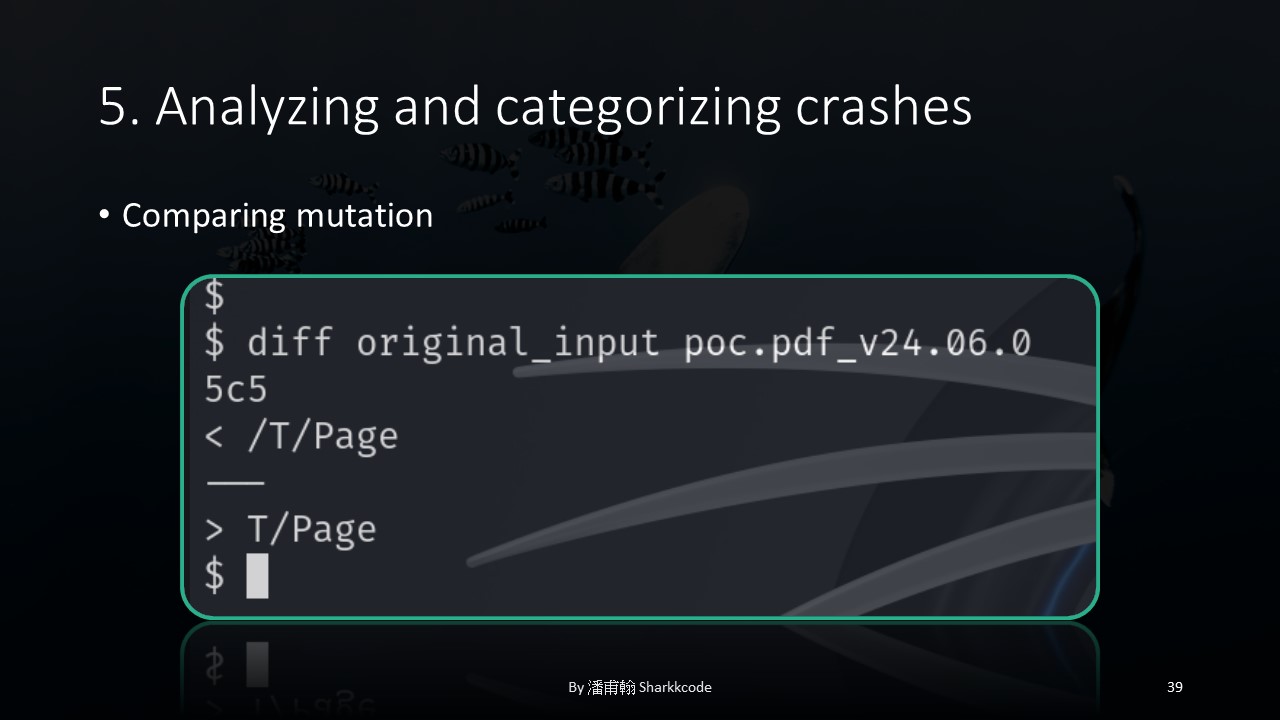
I discovered that a backslash was missing, which seemed to have caused the program to malfunction.
After briefly analyzing the crashes I found, considering that this project was open-source, I decided to report the vulnerability to the author first.
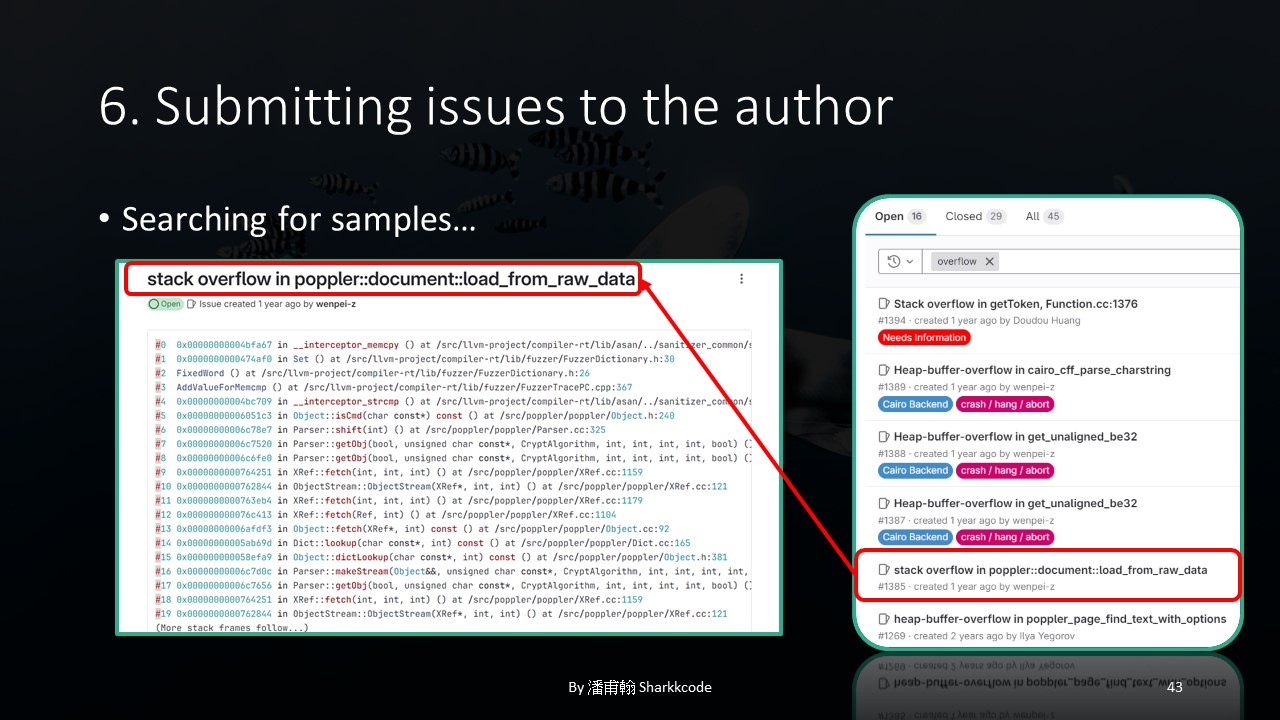
I first searched for previous issues to see how others had written theirs.
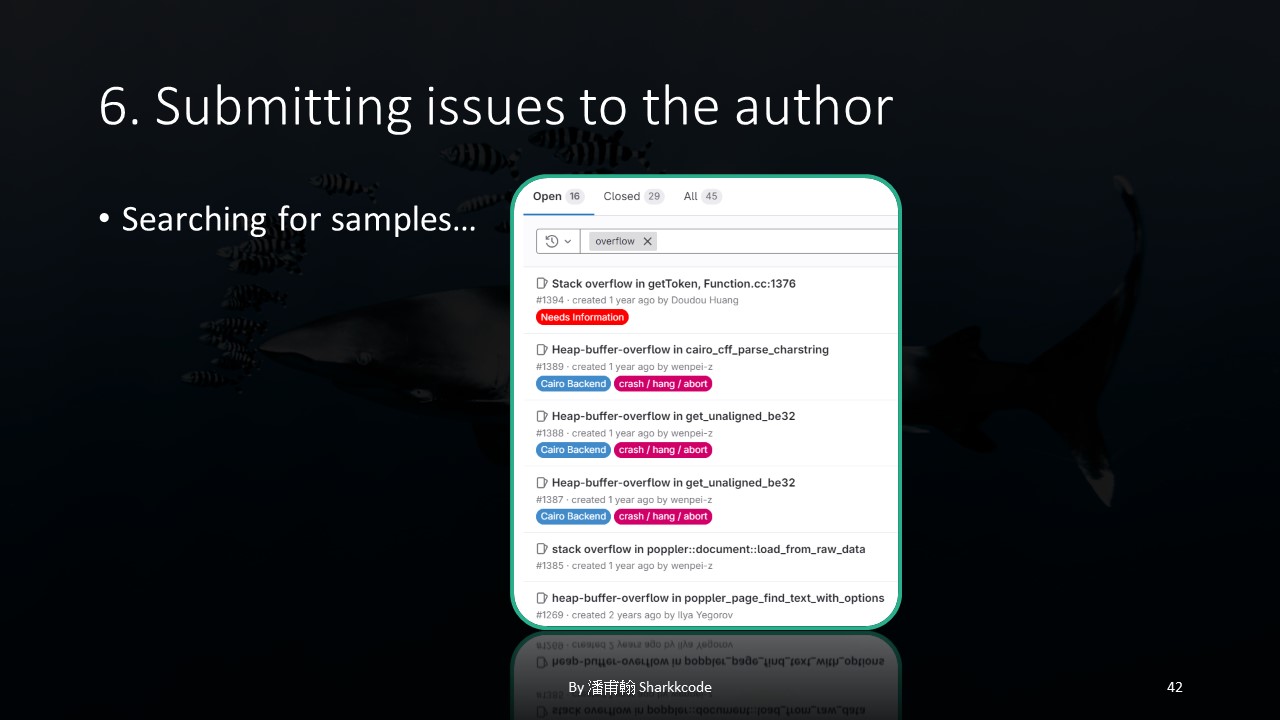
For example, in this issue, the author directly listed some ASAN-like scan results.
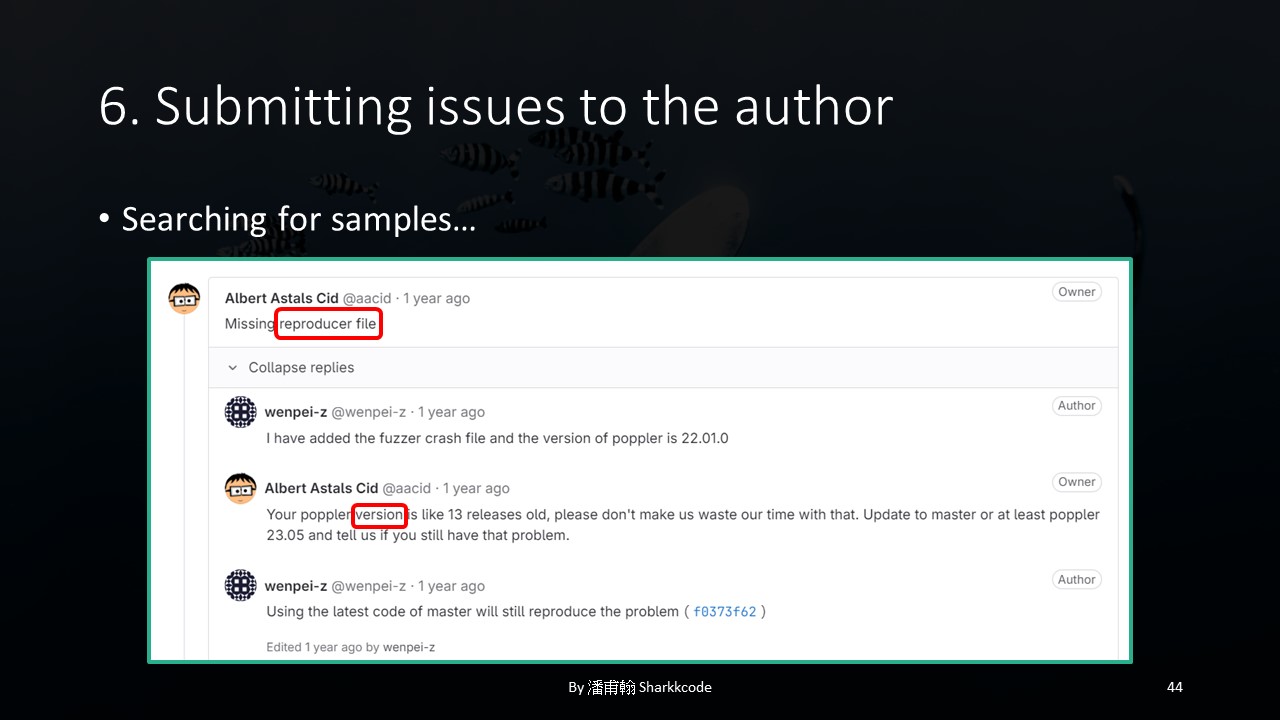
Based on the author’s response, it seemed they required a reproducer file, and the version should be as recent as possible; otherwise, the author might consider it a waste of their time.
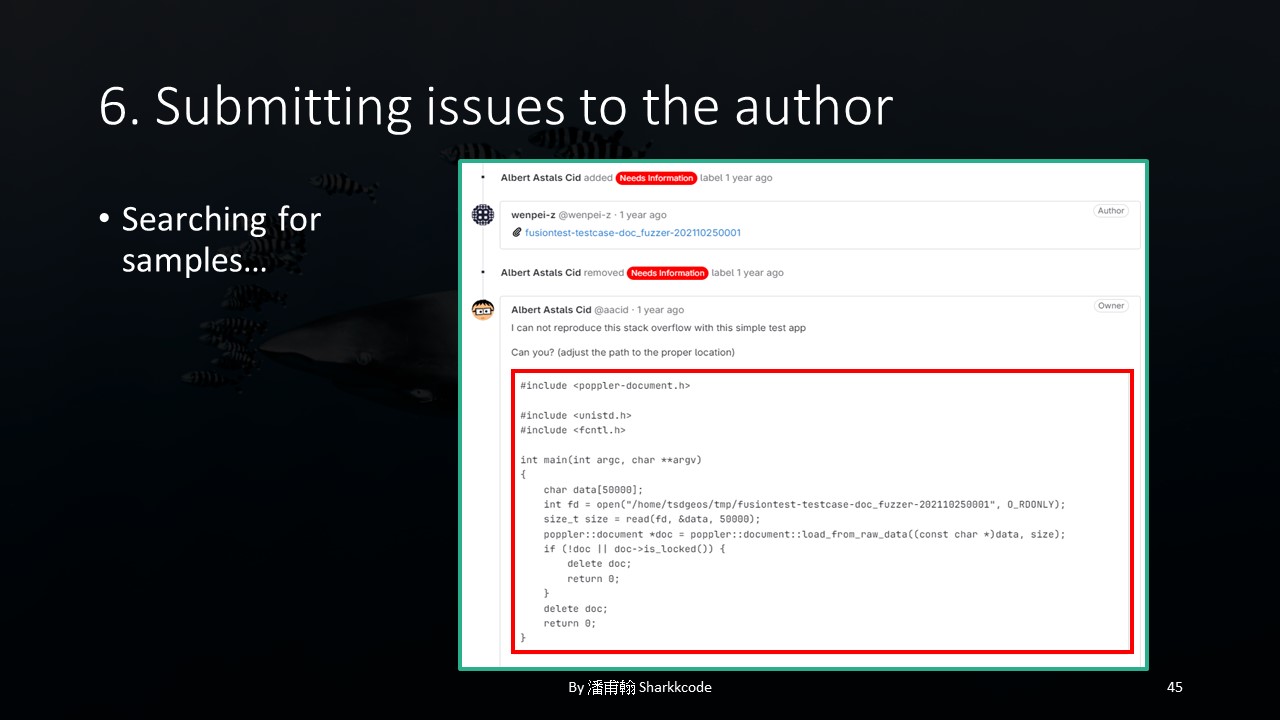
Here, you can also see that the author used this test app to test the program.
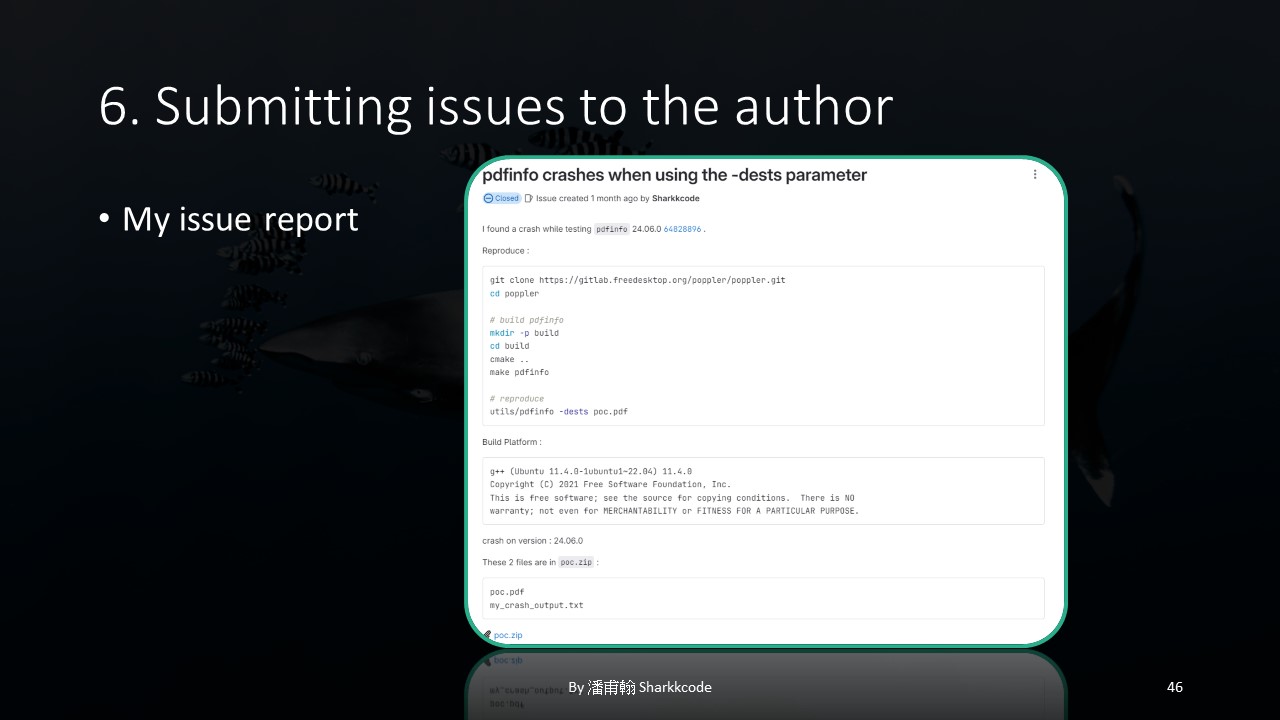
My final issue looked something like this: a clear explanation of how to quickly set up the environment, along with the necessary files to reproduce the issue.
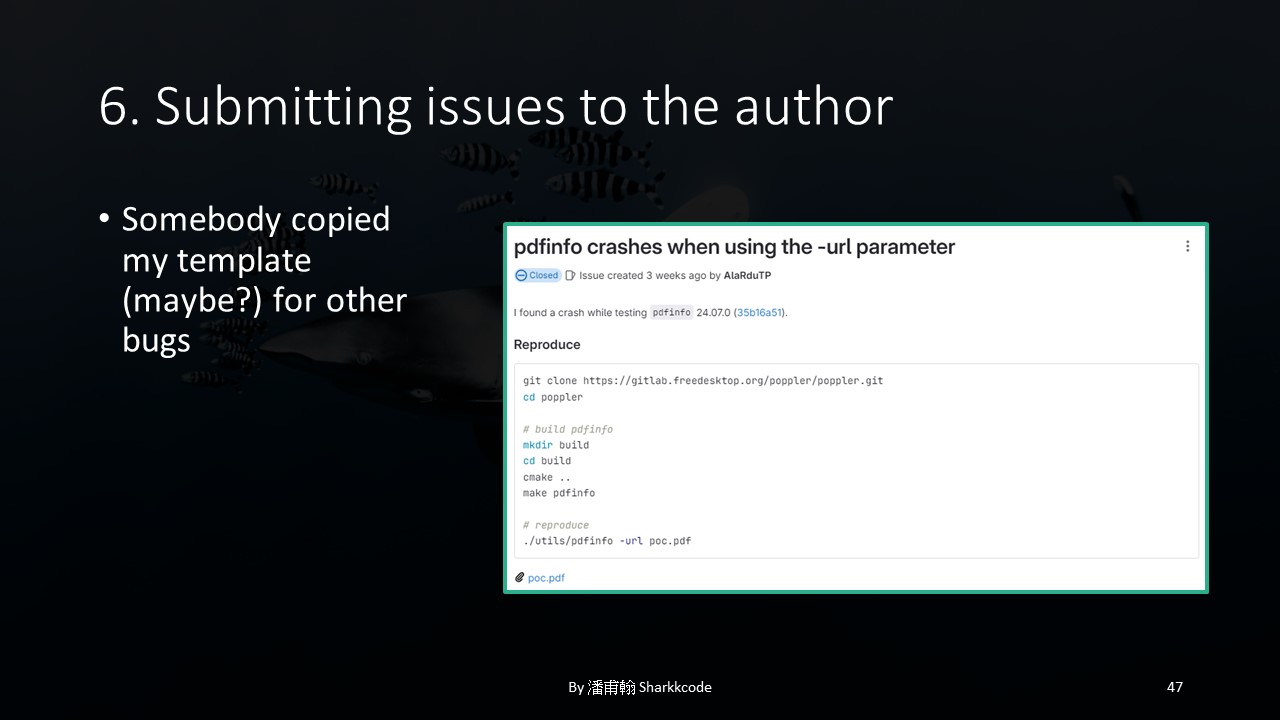
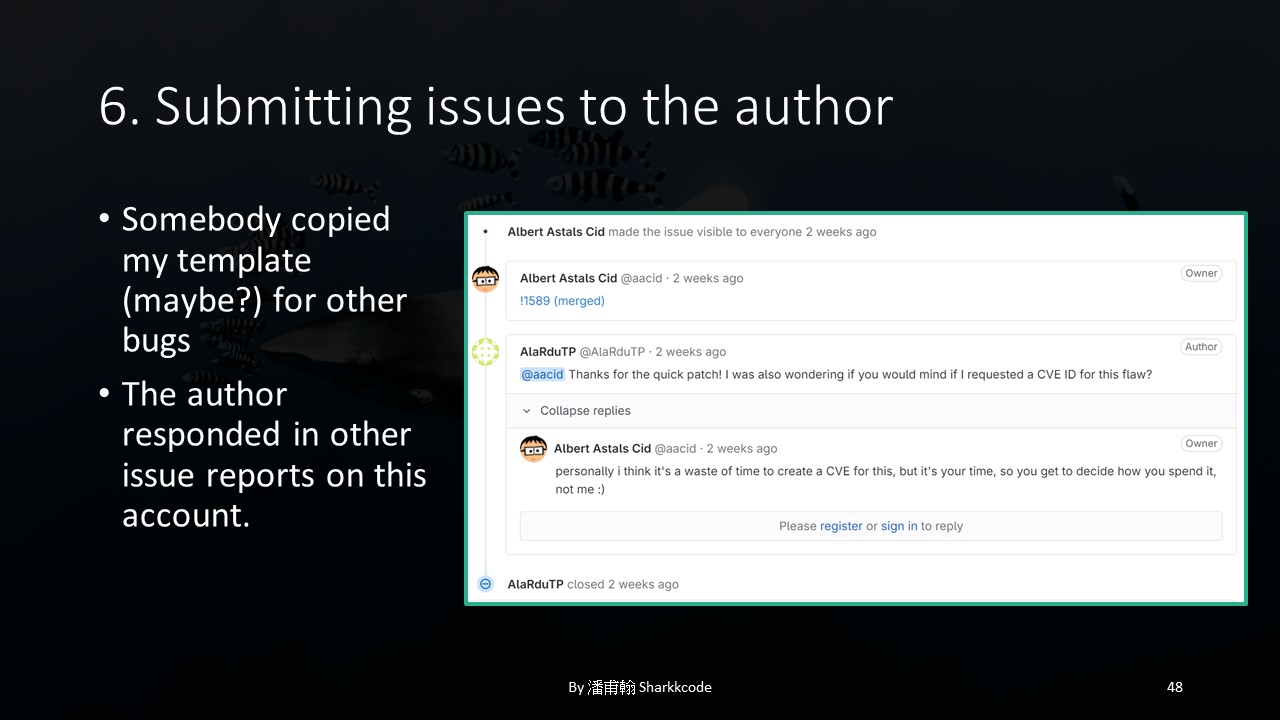
There was a small incident after I submitted my issue. Shortly after, someone else reported an issue using almost the exact same template as mine. Perhaps they thought my template was well-written?
The person who used a template nearly identical to mine later tried to apply for a CVE, but the author coldly replied that creating a CVE for their issue would be a waste of time.
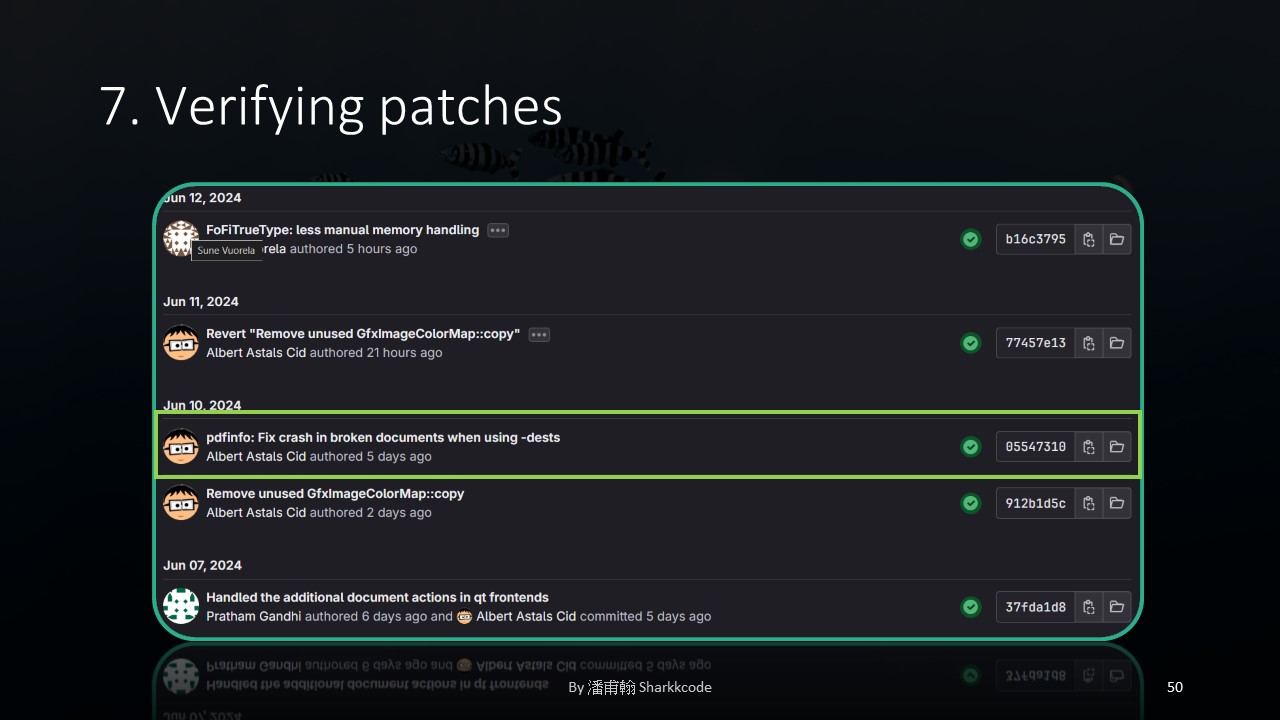
After submitting my issue and observing the small incident with others’ issues, I realized there was something important I needed to do before applying for a CVE: since I noticed that the author had attempted to fix the vulnerability, I wanted to verify whether their patch was successful.

I found the updated patch, rebuilt the project, and tested it.
After running the test program, I found that the program did not crash, which indicated that they had at least successfully fixed the "symptom."

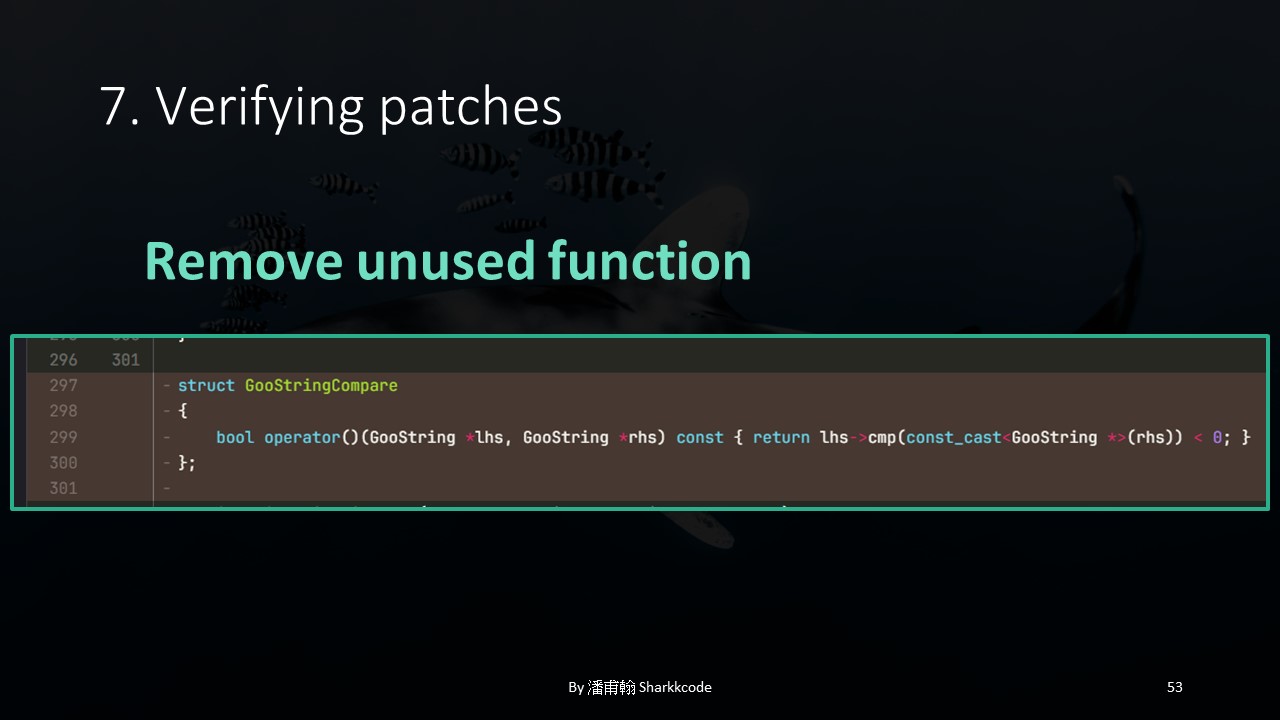
Upon closely analyzing their patch, I noticed that they mainly replaced the GooString class they were using with a simple std::string. However, I wondered, since GooString might have handling issues, and GooString might be a custom class they designed, why didn’t they fix GooString instead of abandoning it? Could there be other vulnerabilities related to GooString? If you’re interested, this might be worth exploring further. I’m not sure if there really are other vulnerabilities, and I didn’t continue digging because I was focused on how to apply for the CVE at the time. I just wanted to quickly verify if the crash was fixed.
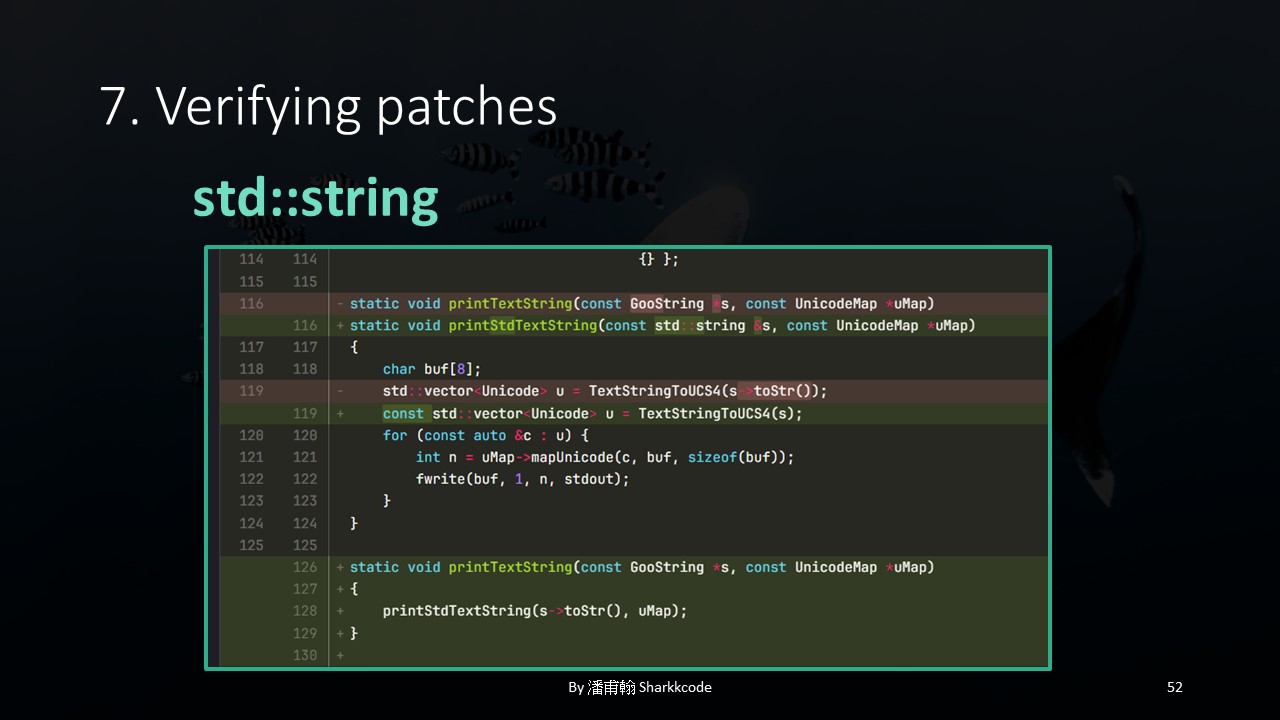
Here’s a summary of their patch details, comparing the removed GooString functions.
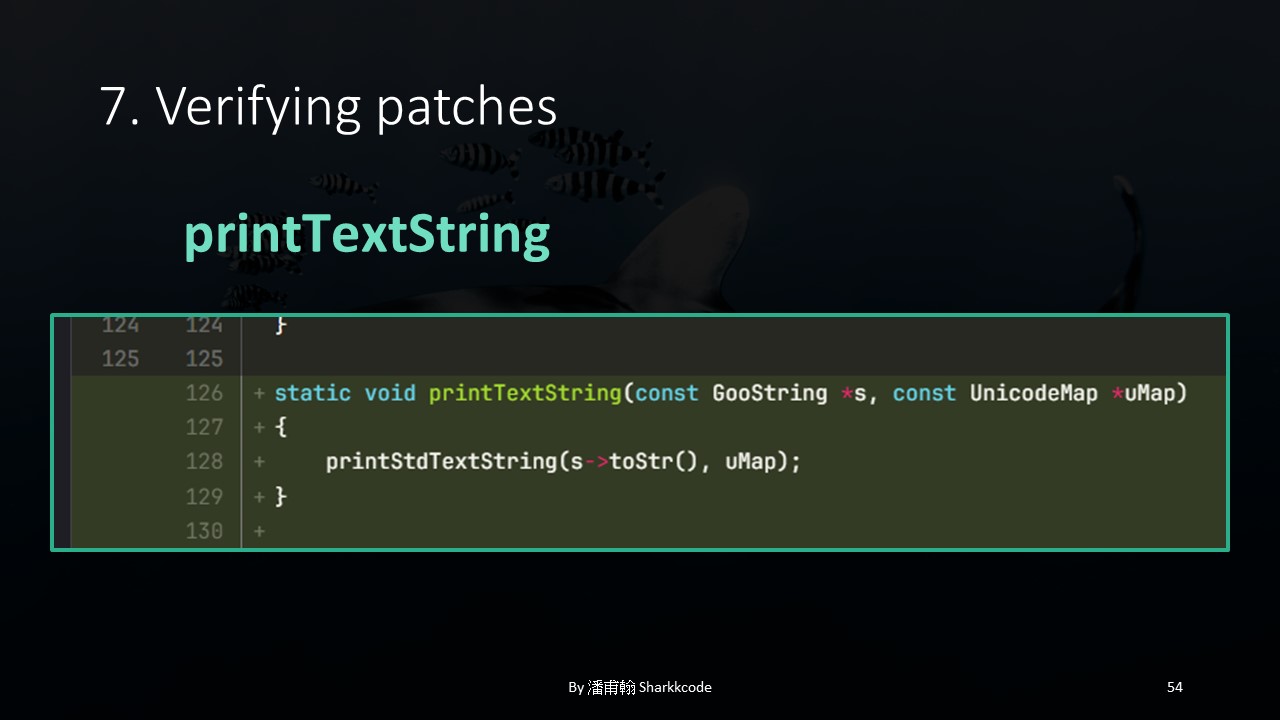
They wrote a new function specifically to convert GooString to std::string .
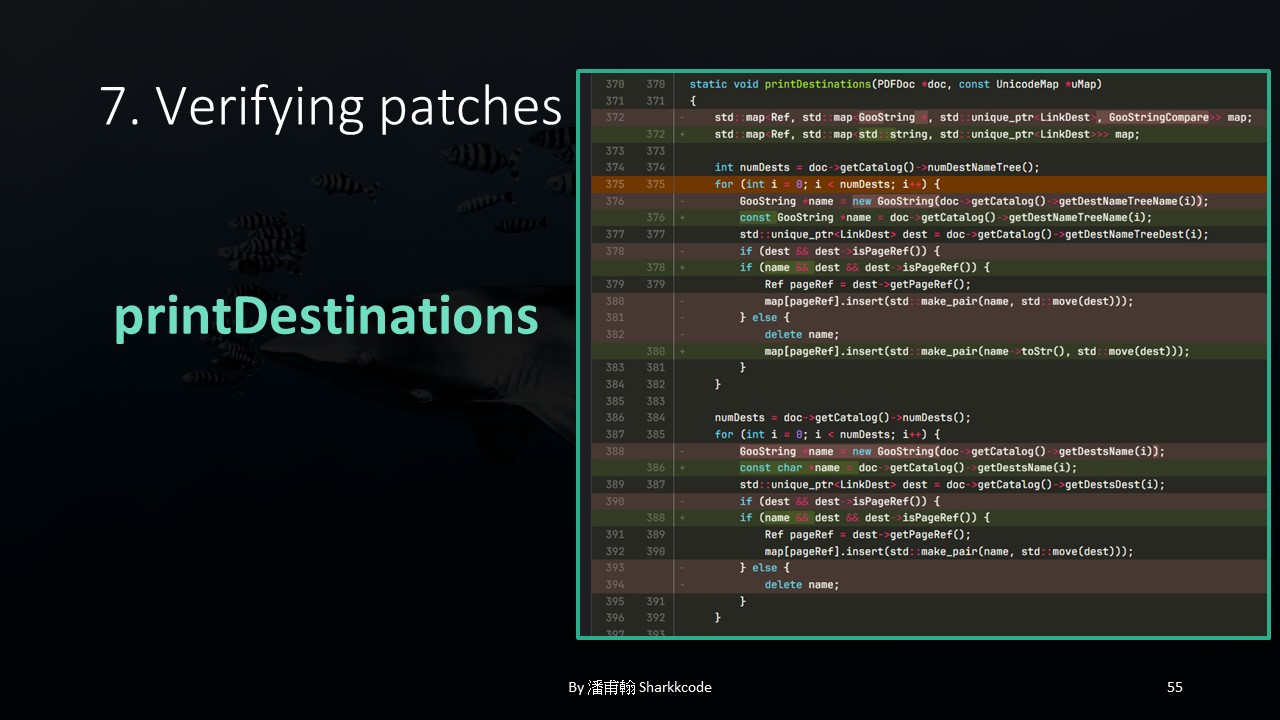
In addition to addressing the GooString-to-std::string conversion issue, they also added a check to ensure that the name value cannot be null .
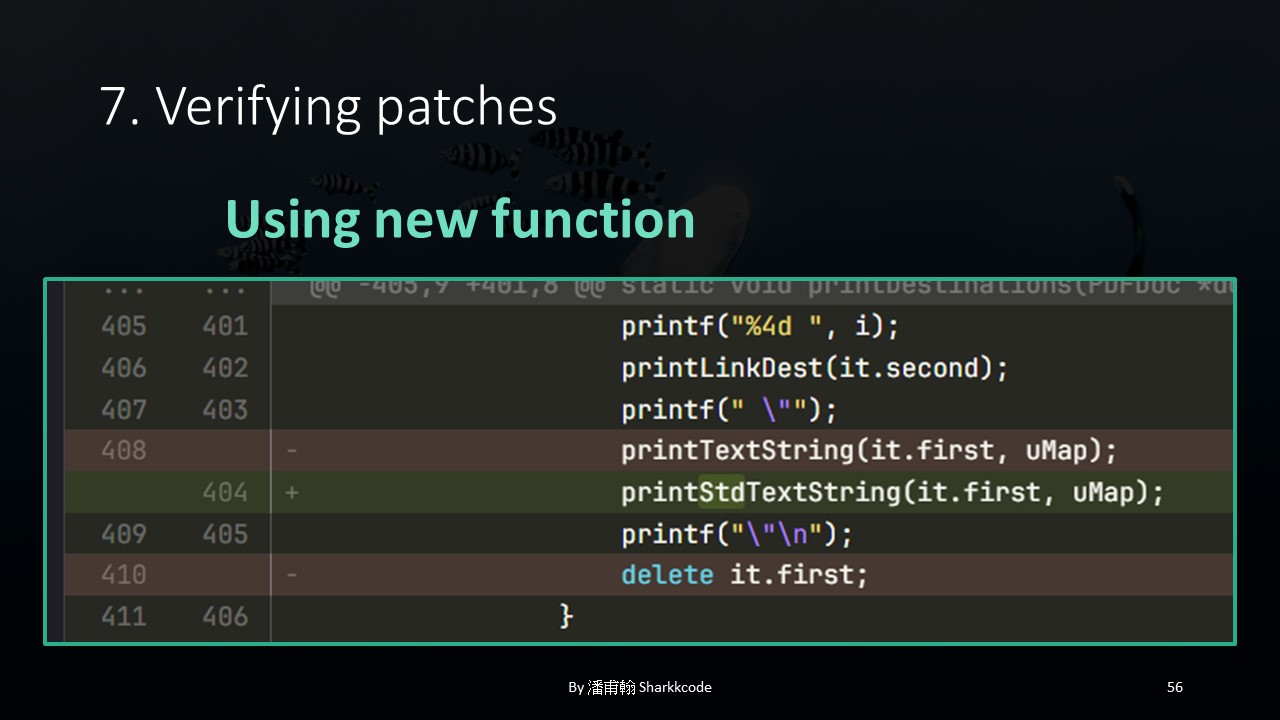
Here, they used the new function to handle std::string .
Finally, we’ve reached the last stage: applying for the CVE.
I directly emailed Red Hat, and I received a reply much faster than I expected. Perhaps it was because I provided more comprehensive information?

I want to emphasize that I applied directly to Red Hat, not to the author, as the author might be very busy. I didn’t want to bother them with the CVE process!

In the end, I successfully obtained my first CVE number. Although the score wasn’t high since I didn’t further exploit the vulnerability, this experience taught me how to start from scratch, identify resources, select targets, find weaknesses, set up a fuzzing environment, analyze the root causes of vulnerabilities, and apply for a CVE number. It was a small but valuable achievement for me.